Firefox Home is a mobile iOS app from the Mozilla Organization. It’s basic function is to give you mobile access to your Firefox Internet Browser History, allowing you to open tabs and bookmarks on your iPhone or iPad.
With its mobile Awesome Bar, you won’t have to retype long URL addresses or spend time on Google searching for your favorite websites. To top it all off, Firefox home comes with a locking feature that allows you to access your data only by entering an encrypted password.
Firefox Home works directly with Firefox Sync, so you’ll have to download and restart Firefox first. As soon as you finish that, you’ll have to connect Firefox Home to your Firefox Sync account. I’ll be walking you through the set up process as it does get a little tricky for some users and then show you how to use all the Firefox Home features.
How to Set Up Firefox Home on your iPhone or iPad
- Set up Firefox Sync on your computer
- Get the easy setup code from Firefox Home
- Connect Firefox Home to your Sync account
How to Use Firefox Home on your iPhone or iPad
- Searching your bookmarks, history and tabs
- Searching the web or going directly to websites
- Accessing your open tabs
- Accessing your bookmarks
- Using the integrated web viewer
- Update your information in the Settings section
Set up Firefox Sync on your computer
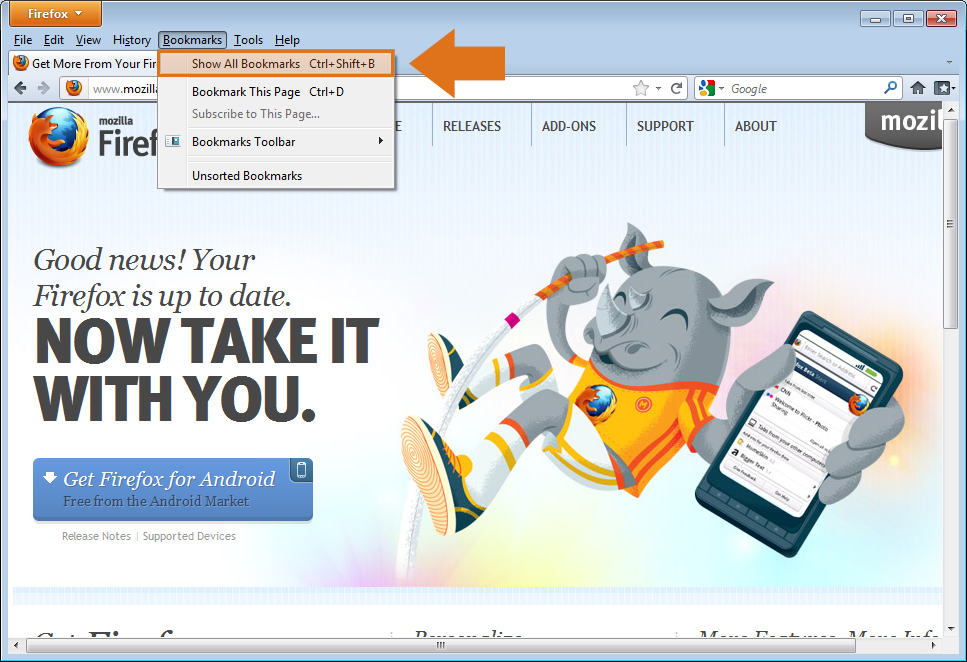
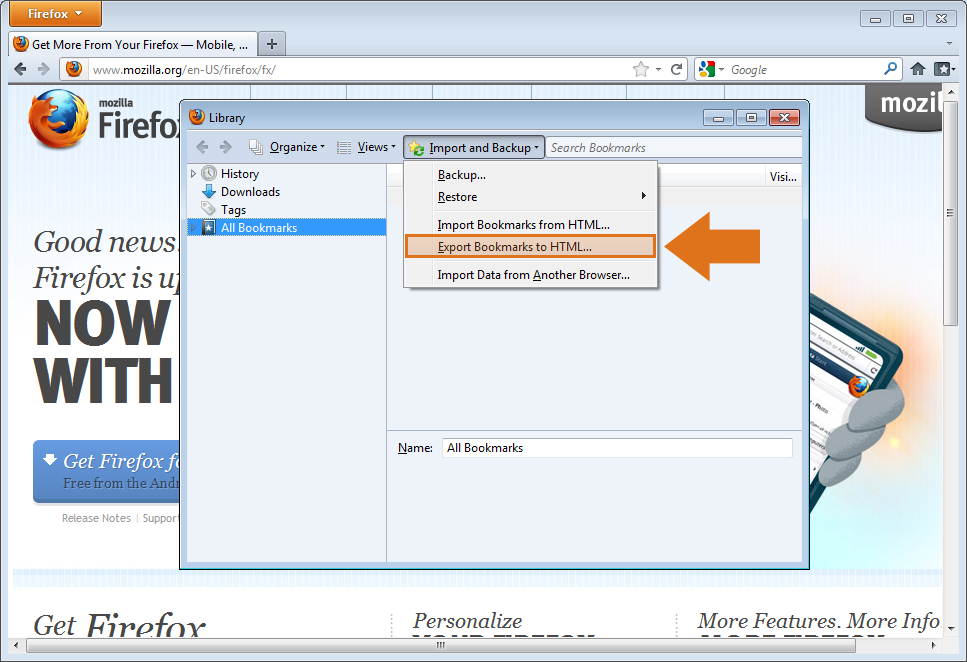
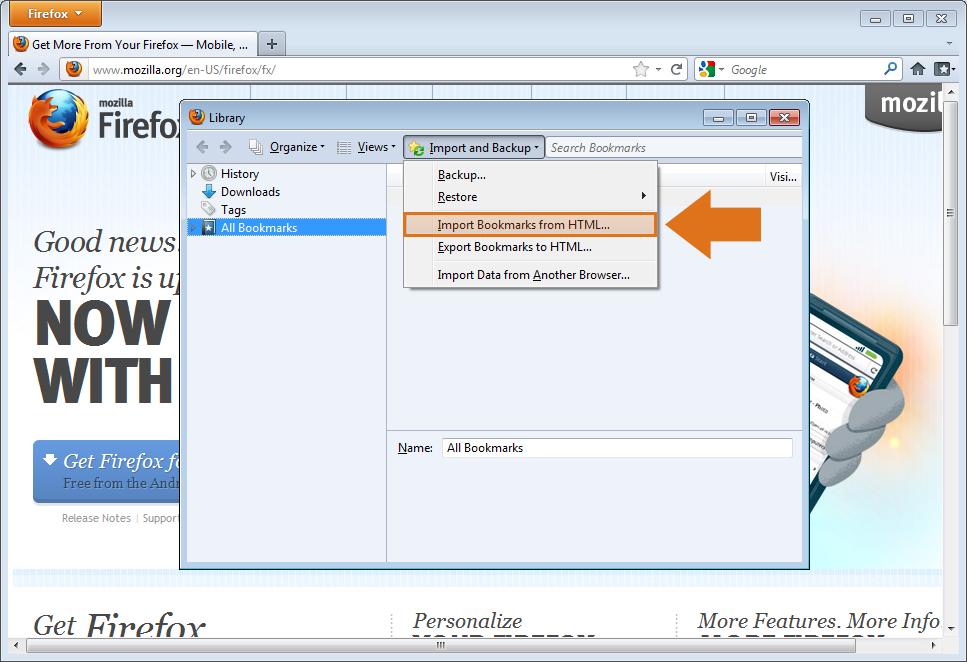
Open Firefox on your computer. If you haven’t already, download Firefox and then import your bookmarks and internet history from your previous Internet browser. Click on the Firefox button at the top of the Firefox window (Tools menu in Windows XP). Next click Options, and in the Options window, click on the Sync Tab.
Click Set Up Firefox Sync.

Click Create a New Account.

Here you’ll need to enter your email address, create a password and then confirm it. Once you finish that, check “ I agree to the Terms of Service and Privacy Policy” and select Next.
You will be provided with a Recovery Key. The Recovery Key is use to secure your data before it’s sent to Mozilla’s servers. Think of it as a key that locks away all your personal information in a safety deposit box that only you can open, and Mozilla’s servers are the bank where the box it held. Just like at a bank, this means that neither Mozilla or anyone else can access your “vault” of information without first having access to your Recovery Key to unlock it. This is a really good time to make a note of your key and store it in a really safe place. When you’re finished, click Next.

Confirm that you’re not a robot by enter the text found on the image. (Those things are always impossible to read I know). But try your best, and then click Next.
You’ll be greeted with a Setup Complete! message. Click Finish to close the setup window and take you back to the Sync panel.

There’s nothing else you have to do on your part. Firefox Sync will now automatically synchronize all of your browser data in the background from here on.
You’re first sync should be rather quick, especially if you just download Firefox. But it could take some time if depending on how much information has to be uploaded.
Get the easy setup code from Firefox Home
Download Firefox Home from the App Store, launch the app, and then tap on I Have a Sync Account.
The twelve character code to add this device will be displayed.

Connect Firefox Home to your Sync account
Here you’ll have to enter the setup code on your Firefox browser to connect Firefox Home to your Sync account.
To do this, first go to the default Mozilla Firefox home page.
At the bottom of Firefox’s home page, click the Sync link to open the Sync settings window.

Next click the Pair a device link and the Firefox Sync Setup window will open.

Enter the twelve character code created on your iOS device and click Next.

As soon as the code is accepted you will see a Device Connected message and your device will automatically begin to sync over all of your Bookmarks, Tabs, and Internet History.
Note: If you’re not near a computer, you can still add Firefox Home to your Sync account by simply entering your account information. From Firefox Home’s Connect to Sync screen, tap on I am not near my computer… Next, enter your email address, password, and recovery key and then enter the information.
Searching your bookmarks, history and tabs
This is exactly like having the Firefox Awesome Bar right on your iPhone or iPad.
If you aren’t already exploring the search tab, Launch Firefox Home and then just tap on the search button at the bottom of the Firefox Home app window.
Tap on the search bar at the top of the window and the keyboard will come up.
To search through your various bookmarks, open tabs, and Internet History, just begin typing the first few letters of the website you’re trying to find.

As soon you start typing, Firefox Home will begin displaying all of its related results.
The results will indicate if they’re a bookmark, an open tab or a history item with an appropriate icon on located the left.
Usually, just two or three letters of a word will get you to the results you want.
To visit a link, just tap on the listing in the search results. It’s that easy.
To then go back to your search results, you can tap on the Home button located at the top of the window.
Searching the web or going directly to websites
If you want to visit a site, but it’s not in your bookmarks, tabs or Internet History, don’t worry! We can still get there.
Go ahead and tap on the search button again at the bottom of the Firefox Home app window.
Tap in the search bar at the top of the window and the keyboard will come up again.
Type in the name or address of the website you want to go to.

If you type in the complete address or if the word you entered matches a top domain, clicking the link that’s displayed will take you right to the website. If Firefox Home can’t find a match for what was entered then the app will simply take you to the Google search results.
If you want to then go back to the previous screen, tap the Home button at the top of the window.
Working on some Internet research and want to pick up where you left off with access to the tab you had open on your computer? No problem.
Tap the Tabs button at the bottom of the app window and all of your open tabs will then be listed.

To visit a site on your tabs, just tap on its listing.
To return to your open tabs, tap the Home button at the of the window.
Now you can have access to all of your favorite Firefox bookmarks without being stuck having to just use the Safari App on your iPhone or iPad. Neither do you have to keep typing in all of those long URL addresses. You don’t even have to type anything in at all. All of your Firefox bookmarks are synced right here.
Tap on the Bookmarks button at the button of the app window and all of your bookmarks will be listed.

The bookmarks toolbar will be listed first followed by your bookmarks menu and then you unsorted bookmarks.
To visit one of your bookmarked websites, just tap on its listing.
To return to your bookmarks, tap the Home button at the top of the window.
Using the integrated web viewer
Once you’ve selected a website, it will open in the iPhone’s integrated web viewer. The controls are at the bottom of the web viewer window.
For your convenience, there are back and forward arrows for navigating through all of the websites you’ve opened.

There is also a reload button to refresh the current page as well.

Finally, there is an export button that lets you view the current website in Mobile Safari, Email the website’s URL using the iOS Mail app, or copy the URL.

To return to Search, Bookmarks or Tabs, tap on the Home button at the top of the window.

Update your information in the Settings section
Every time that you launch Firefox Home it will update its copy of your bookmarks, history and tabs from your Firefox Sync account. If, for any reason, you need to make Firefox Home update your information while you’re still using the app, just tap on the Refresh button in the Setting section.

If you’re having some problems seeing your information in Firefox Home, one thing you could do is a full refresh of your data.
In Firefox Home, tap on the Settings icon at the bottom of the window and then tap the Sign Out button at the top of the window.
Click the Sign Out button again and you will be presented with a log in screen.
Enter you Firefox Sync username or email address, and password to log in and automatically refresh all of your data.