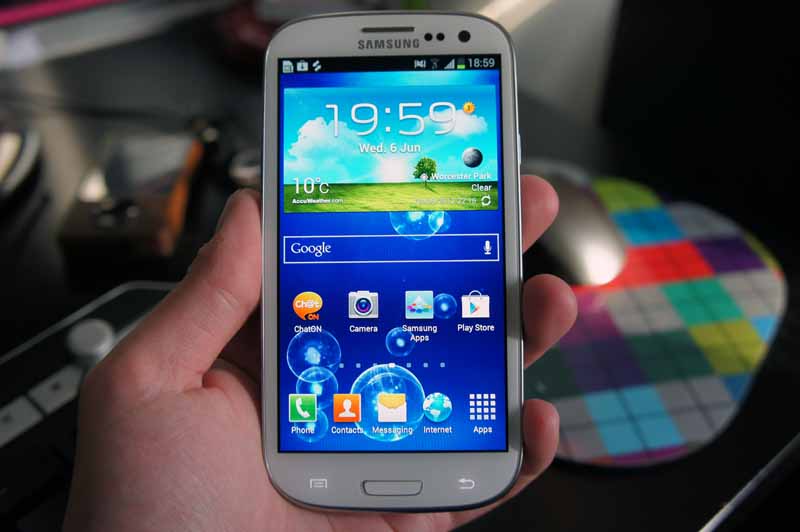
The Samsung Galaxy S3 has arguably become the most popular Android phone of 2012 – following in the footsteps of its highly successful predecessor, the Samsung Galaxy S2.
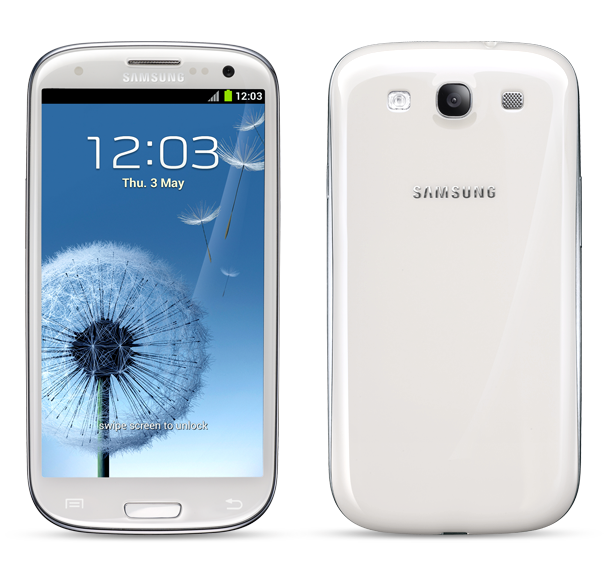
If you’re looking for a smartphone with a really big screen and tons of features, the Samsung Galaxy S3 will give you top notch performance with so many sharing and media features, you’ll still be discovering new ones a year from now.

The Galaxy S3 comes with an enormous 4.8 inch 720p resolution display and a mega-fast quad-core processor running the show behind the scenes. There’s a shiny new design to rave about as well, although with its rounded look and corners, some are regarding it as a bit old school.

The Samsung Galaxy S3 comes in both 16GB and 32GB microSD card storage options. You can, however, expand these on your own or wait for the 64GB Galaxy S3 to arrive later this year. International Samsung Galaxy S3 on all carriers that offer it are very similar, so we’ve compiled performance reports from a number of models we’ve reviewed to give our overall impression of this smartphone. So without further delay here’s our review on the 2012 Samsung Galaxy S3.

 Why should I get the Samsung Galaxy S3?

The Samsung Galaxy S3 definitely falls under the “premium” smartphone category. But for those of you on a tight budget, there are certainly quite a few mid-range Android phones on the market that are great as well. The Samsung Galaxy S3 is a smartphone for those who are willing to pay a hefty price tag for an extremely powerful device. If you want HD video streaming, custom web surfing, 3D gaming, and high quality photo capture on a super powered processor with a massive display, then the Samsung Galaxy S3 is definitely a top contender.

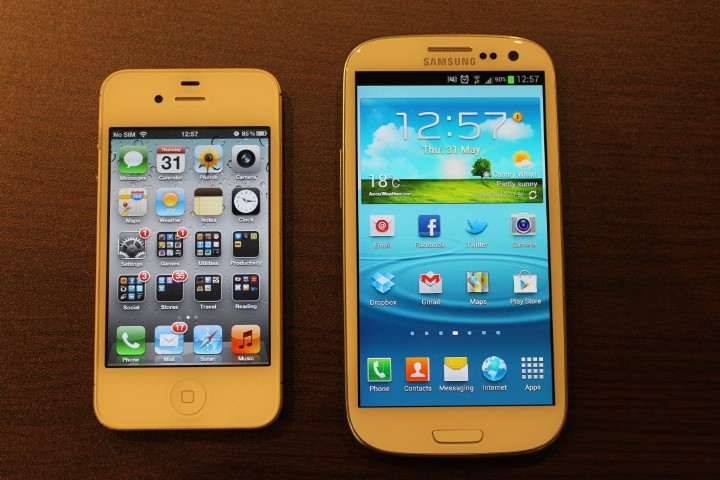
Its chief competitor in the Android market would definitely have to be the HTC One X in my opinion, which is also the more affordable choice but not considered as powerful as the Samsung Galaxy S3. The “top rival” position though would definitely have to go to the Apple iPhone 4S, which comes in at roughly the same cost as the Galaxy S3. The iPhone’s iOS software is generally considered to have a simplified interface that’s easier to use than Android. But for those of you who love the freedom and control of that Android’s customization delivers to your digital environment, the Galaxy S3 would be the better choice.

Wi-Fi, Audio, and Call Quality

I was surprised to find that the default call quality was actually very good by today’s standard. Volume was definitely on the high end, with no noticeable distortion from loud inputs. Its speakerphone isn’t quite up to par however, great to use indoors or while driving, not so much in crowded public areas. The integrated microphone did a superb job of cancelling background noise, while Bluetooth headsets worked perfectly with the Samsung S Voice calling system.

Within the Galaxy S3’s call settings, a Volume Boost button bumps up the audio significantly for noisy areas, and a custom call EQ option allows you to customize audio call quality to your specific hearing.

The earpiece sounded crystal clear as well, with EQ customization available for it as well. No issues with its microphone either.

The Galaxy S3 supports Wi-Fi on both 2.4GHz and 5GHz bands in addition to Bluetooth 4.0.

Software and CPU Performance

The Samsung Galaxy S3 runs the Android 4.0 Ice Cream Sandwich operating system. Up until just last month, Android 4.0 Ice Cream Sandwich was the most recent version of the Google operating system. Released in July 2012, Android 4.1 Jelly Bean will be officially available as an update to the Samsung Galaxy S3 sometime this fall.

Google’s Android is a very powerful, yet flexible operating system that leaves plenty of breathing room for user customization. Its biggest strength could also be its biggest weakness however, since a multitude of options and tools can be a little overwhelming for the casual newcomer.

In addition to Android, Samsung threw in its own software, TouchWiz. This is the same interface you’ll find on the Galaxy S2 and Galaxy Note. TouchWiz definitely looks great, but it sometimes loses favor in the ease-of-use department.

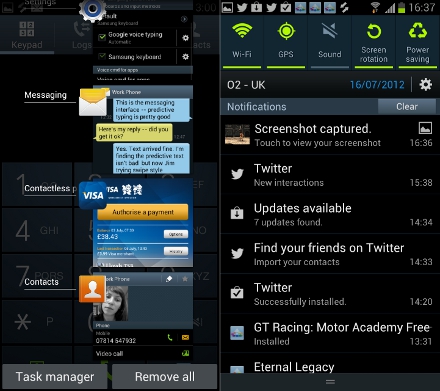
For example, in order to add a widget to the home screen position of your choice, you have to navigate into the apps view, switch to the widgets tab and then long press on the widget. Another example is the notifications interface. Even if you turn on SMS notifications in the settings, if the notifications icon is toggled off in the notifications tray, you won’t hear any sounds until it’s toggled on. It all works out once you see this icon, but if you haven’t, you’d be lost as to why you can’t hear when you receive an SMS.

Bottom line: Galaxy S2 users won’t have any trouble using the new S3 interface, but newcomers will have to dedicate more time getting used to it.

Design

All Samsung Galaxy S3 models look the same with the exception of different carrier logos engraved on the back panel.  Color options include white, dark blue and red exclusively with AT&T. Measuring 5.4 by 2.8 by 0.34 inches and weighing in at 4.7 ounces, the Samsung Galaxy S3 is one of the biggest phones we’ve seen in a long time. It has a removable 2100mAh battery and a microSD card slot with storage support of up to 64GB.
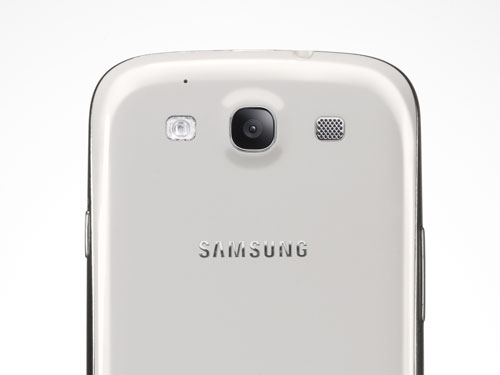
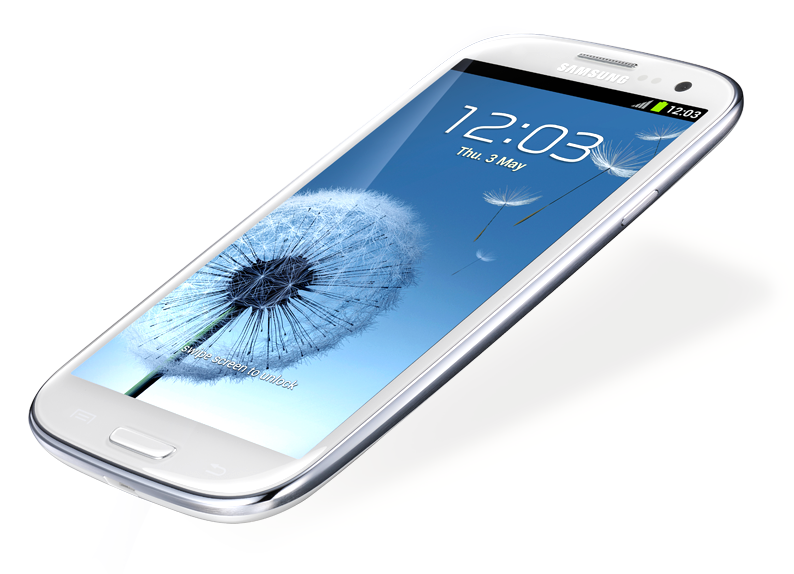
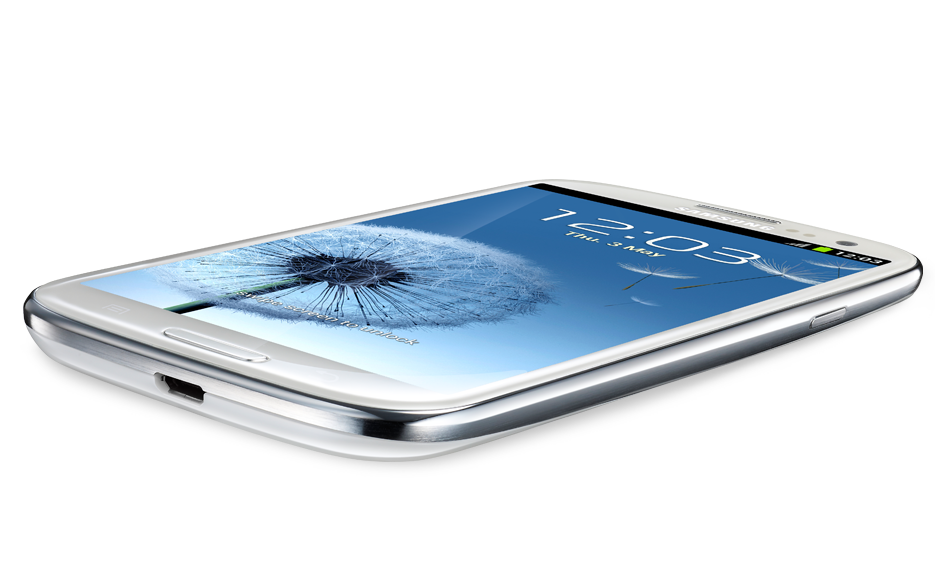
For this model, Samsung went for a more oval-shaped look that resembles the Galaxy Nexus more than its rectangle-shaped predecessor, the Galaxy S2. The Samsung Galaxy S3’s corners are smoothed and rounded, while its curved back is lacking the rear-facing bumps present on both the Nexus and the S2.

Its 8 MP camera is located on the back panel, which, thanks to a highly reflective finish, can double as a pocket mirror. (Just don’t expect to see that on the official Samsung Galaxy S3 features page).

Despite its size, the Galaxy S3 is surprisingly light in comparison to the Droid Razrs and the HTC one series. Nevertheless, the phone is incredibly well built, and light despite its size.

Below the front screen, there’s the physical touch Home button we’re all familiar with, as well as a light-up back button and multitasking button that start out invisible, so you have to memorize where they are or just change the settings to keep them constantly lit.

This button placement is somewhat inconvenient. We found ourselves accidentally triggering them with our hands once or twice because they’re so close to the edge of the phone.

The power button doesn’t stick out much on the curved right edge of the S3, so it’s a little inconvenient to use. The volume buttons on the left side of the phone however are big enough to use easily, and highly responsive.

The back of the Galaxy S3 has a high-gloss finish, so those of you with sweaty palm issues beware. The chrome trim also has a super-shiny coating so its sides are kind of slippery. These high-shine surfaces are compounded by all the gentle curves of the phone. Basically after a few days of use I found myself in line for a rubber grip case – which I would recommend you use on all smartphones anyway.
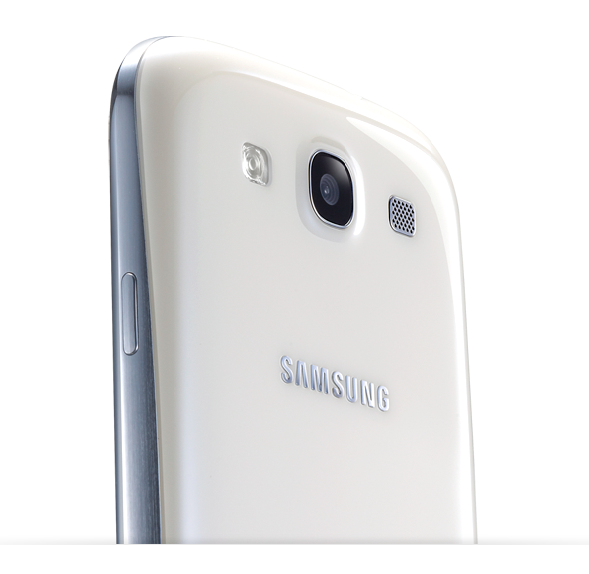
The rounded corners are kind of retro for my taste, reminding me a bit of my Palm Treo 680 days. And yet, the Samsung Galaxy S3 still finds a way to still feel surprisingly modern to me with a luxurious feel. Even with its large screen, the S3 is very manageable. Sure you may have to stretch your hand out a bit to reach everything, but the advantage of having so much room to look at your photos, videos, and apps really make it a big plus in my book.

Overall built quality has been all around strong for the Samsung line smartphones, and the Galaxy S3 is no exception. Despite being made predominately of a glossy plastic casing, it feels reassuringly stuck together. The screen is rock solid and the generous chrome trimming keeps everything in line. I wouldn’t recommend risking a drop however – as I’ve already seen an S3 with a cracked screen after taking an accidental fall.

You can make the S3 faintly creak by squeezing it tightly from the sides. But taking into account that it has a removable backplate for battery, micro SD and micro SIM slots, it’s not surprising. But overall, the design quality of the Samsung Galaxy S3 has a premium look and feel.

Screen

The front of the Samsung Galaxy S3 is almost completely taken up by its 4.8 inch, 1280 by 720 pixel Super AMOLED High Definition screen. It’s a PenTile screen, which can sometimes look a little by pixilated, and it’s a bit dimmer than other well known premium smartphones. But you can always turn off the auto-brightness however, which will eliminate the dimness effect. PenTile screen technology is well received for many reasons actually, but mostly because of its low power consumption as compared to simple RGB stripe displays, and its ability to achieve an HD resolution on an AMOLED screen.

The Samsung Galaxy S3 display measures an impressive 4.8 inches on the diagonal which makes it one of the largest smartphones currently on the market. But while you may find your thumbs stretching in new and interesting ways, the main benefit here is that a larger display makes your video, pictures and games look absolutely marvelous.

This is a full HD Super AMOLED screen, which is the same display technology implemented on the Nexus and Note, both of which are also eye candy. AMOLED screens offer vibrant colors and extremely deep blacks. The only downside is that, unlike the Samsung Galaxy S2, the S3 is does not have a Super AMOLED Plus display. That translates to fewer sub-pixels per pixel than the S2’s screen. Some of you might but a little discouraged at this fact, but I sincerely doubt the majority of you will even notice a difference.

Another letdown for me was how the Galaxy S3 performed under direct sunlight. To be honest I was hardly surprised considering not many smartphones do well under the sun anyway, but I had to really struggle to see the S3’s screen during the hours of noon to 3pm, with content ghostly and indistinct and a reflective blue sheen masking what’s on the screen. I spent most of my time sitting at a desk so it’s not a huge issue for me, but if you do need to use your phone outdoors a lot, there are quite a few smartphones that are designed with outdoor viewing in mind.

The Samsung Galaxy S3 pixel density per inch is actually not the sharpest currently on the market. At 306ppi it’s not quite as high resolution as the Sony Xperia at 342ppi, the HTC One X at 312ppi, or the iPhone 4 and 4S at 326ppi. But it is still an impressive screen nonetheless. The general consumer probably won’t notice much difference between all of these displays at all.

Camera

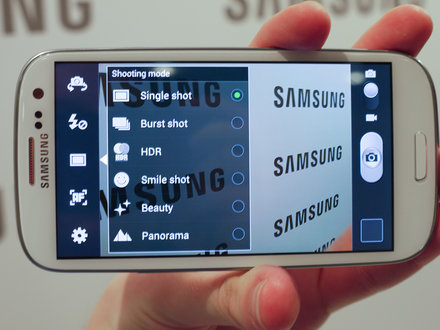
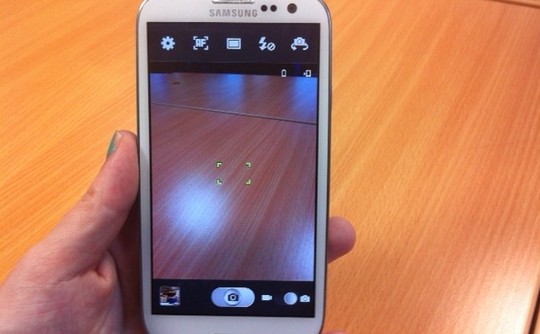
The Samsung Galaxy S3 comes with an 8 MP camera, which is no improvement in resolution from last year’s Galaxy S2. It may not have improved in pixel count, but the S3 does have a few extra features, including the zero shutter lag found also in the Galaxy Nexus, and a cool feature that automatically suggest your best shot after you’ve made a few similar captures, basing its decision on factors like smile detection and face recognition. Another new addon that I really loved, also present on the HTC One X, is the ability to take still images while you’re recording video.

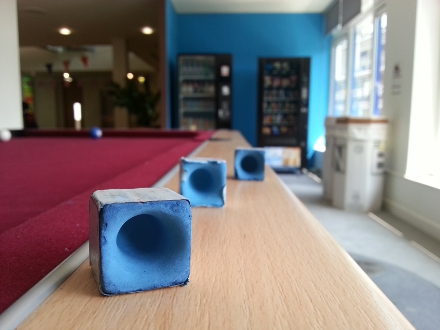
The Samsung Galaxy S3 Camera was definitely impressive, producing professional quality close-up shots, both indoors and out, and having a really good shallow depth of field. Overall, its colors are true to life, with the exception of some slight over saturations on some shades.

It’s also really good at dealing with the lower light of an indoor environment, but it does have some very slight issues with variable light conditions across one scene. I found it would wash out parts of the scene, while also suffering from the occasional lens flare.

The Samsung Galaxy S3 camera fairs pretty well against other premium smartphones, beating out the Sony Xperia S, but not quite up to par with the iPhone, HTC One X, or the Nokia 808 PureView.

The Galaxy S3 also shoots full HD video at 1080p resolution. Video results during testing tests were less impressive than camera shots, with a tendency to look a little hazy at times. Levels of detail also change with slight movement of the frame, such as during walking. There is also a 2 MP camera located on the front for video calling, Face Unlock and Samsung’s face detection feature, which stops the phone’s screen from dimming as long as you’re looking at it.

Contacts and Messaging

The Samsung Galaxy S3 contacts application includes some cool new features. When you swipe left over a contact’s name, it will take you straight to the messaging menu so you can send an SMS very easily. If you swipe to the right of a name, it will automatically call the contact without you having to tap twice.

You can create groups or lists of contacts so you can quickly sent emails or SMS to multiple people at one time. If you’re trying to find a contact in your address book, you can press on the corresponding letter of the alphabet in the index at the right hand side to jump down to the right section, or you can also just start typing their name into the search box. The software favors last names over first so make sure you remember that!

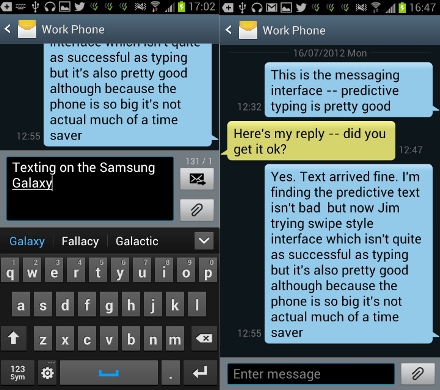
The basic messaging interface of the S3 is clean and very easy to use. It displays a speech bubble graphic to show conversation threads. If you’re composing a text in landscape mode you won’t be able to see the preceding messages in the thread, but in portrait mode you can scroll back through to read them if you want. The well known “Swype” style interface is preloaded on the Galaxy S3, which can be switched on, if you turn on the continuous input within the Samsung keyboard settings.

Eye tracking

A cool new feature on TouchWiz is Samsung’s eye tracking technology. This uses the Galaxy S3’s front view camera so it can keep the screen on if it detects a face looking at it. It’s a really cool addon that works great if you’re holding the phone directly in front of your face. But if for any reason you’re looking at it from an angle, (maybe you’re resting your head on a pillow or something), it won’t register your face and will turn off anyway. The flashing eye symbol is also a bit distracting, delivering a constant, eerie reminder that your S3 is watching you.

Face and Voice Unlock

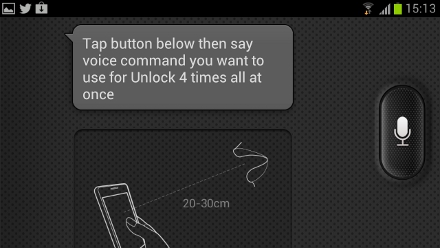
Using the S Voice feature I’ll mention talk about a bit later, The Samsung Galaxy S3 allows you to set a facial and voice recognition code before it unlocks the phone. It’s pretty straightforward to set up, but I can’t imagine many people wanting to talk to their phone every time in order to unlock it.

Web browsing

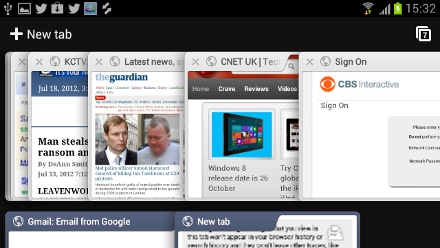
On this high resolution display with the S3’s powerful processor, it’s almost a given that this phone would have excellent web browsing. Websites are very quick to render (depending on your cellular network of course) and look absolutely gorgeous on this larger display. Still no support for Adobe Flash however, so some embedded video and other content won’t display.

The S3 scored 1,498.9ms on the SunSpider JavaScript benchmark test, which evaluates a browser’s speed — beating the iPhone 4S’s score of 2,181.6ms by a considerable margin, and more than halving the Samsung Galaxy S2′s 3,445.3ms. Lower is better in this test as it’s a measure of time taken.

The S3 even trumps the new iPad in this test. Apple’s newest tablet scored 1,890.9 when we benchmarked it, while the iPad 2 was about the same at 1,884.6 — both taking slightly longer than the S3.

Apps

One cool little thing to mention first within the Apps section is that the Samsung Galaxy S3 comes with two years of included online storage for Dropbox, giving you 50GB worth of memory to dump all of your files and media in.

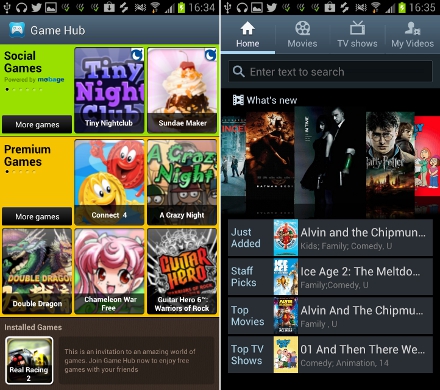
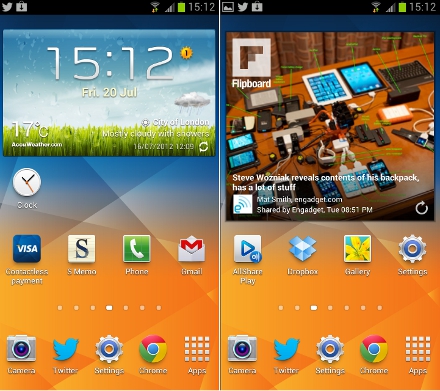
The former Apple exclusive app, Flipboard, comes with the Galaxy S3 and turns updates from your favorite social networks, websites, and blogs into a clean, magazine-style layout. The Galaxy S3 also comes with a lot of preloaded Samsung apps, several of which, including S Suggest and Games Hub, give you additional ways to get content on your phone, as well as being able to download apps from the Google Play Store.

Music

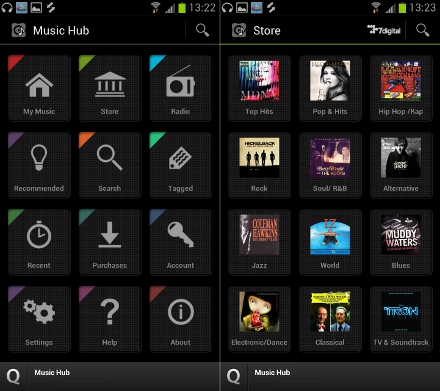
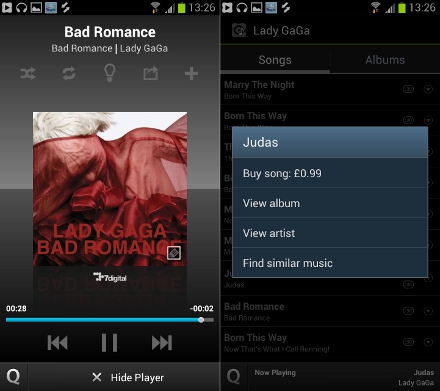
Samsung’s Music Hub app makes an appearance on the Galaxy S3, which links through to a 7 Digital-powered music store where you can listen to clips and download songs right on your phone.

Purchasing songs is a fairly simple task, organized similarly to Apple’s iTunes.

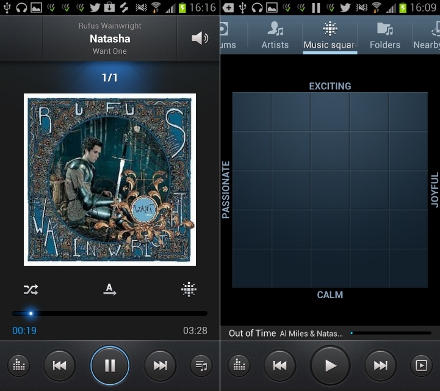
Once you’ve download all your favorite music you can play them using the Samsung Music Player.

This includes the Music Square feature, which designs custom playlists based on the music your listen to.

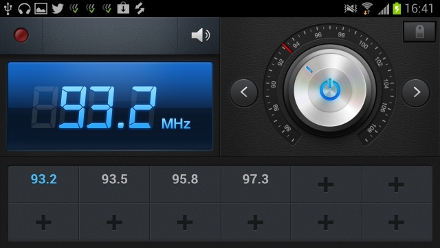
In addition to Music Player, Samsung had the FM Radio app which comes with an analogue-style knob interface and the ability to save station presets so you can easily come back to them with a single tap. From this app you can also record content from the radio station you’re listening to.

Gaming

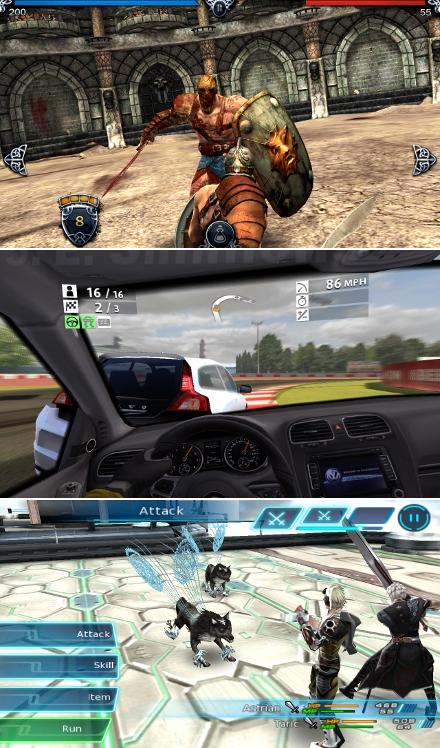
With its 1.4GHz quad-core processor, the Samsung Galaxy S3 is more than capable of delivering high resolution video and graphically demanding 3D games. Its performance feels smooth with little to no lag on some of the heavier graphics games.

Well, I guess what I’m saying is it will be very difficult to find a game on Google Play that will stretch a processor to its limits. Gameplay overall its smooth, with no noticeable slow down.

AllSharePlay

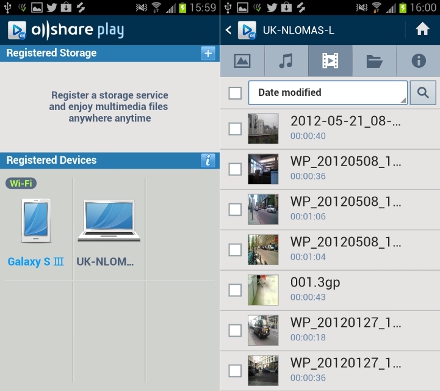
AllSharePlay is a Samsung feature that creates a network for your content stored on multiple devices so you can easily access it from your Galaxy S3. Think of it as the “cloud”. To set it up all you need is a Samsung accounts and then download the AllSharePlay software to the devices where you want to access your data from, such as a laptop or tablet.

After you’ve installed the program and logged in, you be able to locate your files when launch AllSharePlay on your Samsung Galaxy S3. In addition to viewing your content, you will also be able to download files locally on your Samsung Galaxy S3 through the app as well. That means you can access your files and download them even when you don’t have a Wi-Fi connection.

S Voice

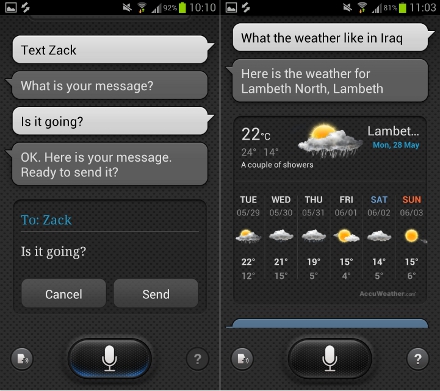
S Voice is a voice control assistant application that resembles Apple’s Siri. Just like the iPhone feature, S Voice has a “tap to talk” microphone icon interface that can perform task like making a call, setting an alarm, giving you the weather, controlling music playback or taking a picture. For the most part though, just like Siri, I had to repeat what I wanted a couple of times and even then I wasn’t guaranteed a right answer. Most of the time I think it’s just quicker to navigate to the feature you want on your phone manually then through voice control.

S Memo

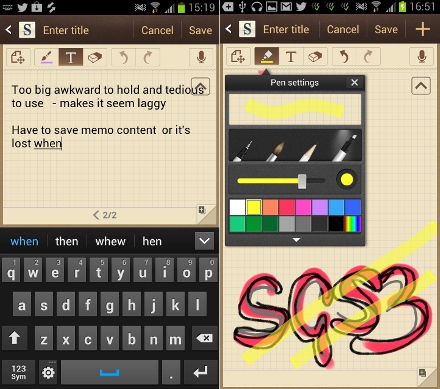
This Samsung feature allows you to design both text or scribble hand drawn notes. It’s has more options than Apple’s Notes app, with a range of pens and colors to pick from, as well as its ability to allow hand written notes, not just typed text. You can also attach photos to memos, encrypt your private memos and add an audio recording too – pretty handy if you like to record a meeting, seminar or lecture as you take notes.

S Planner

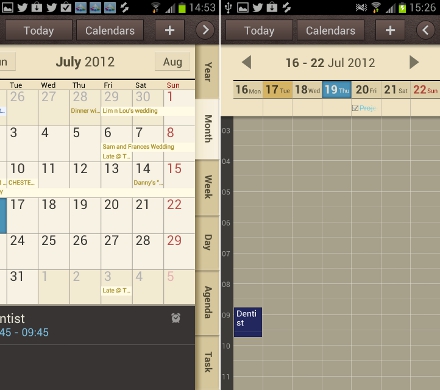
This is the Samsung Galaxy S3 calendar app that comes with some cool features. For example, you can pinch to quickly zoom in and out from day view, to week, to month and to year.  S Planner can also directly synchronize with Google Calendar. Among other you can set reminders, add event participants, and link the app with S Memo, so you can attach notes along with your calendar appointments.

Battery Performance

The Samsung Galaxy S3 comes with a removable 2100mAh battery. A full brightness, the S3 will run through your battery life fairly quickly, so keep an eye on your battery icon at the top corner of the screen. Ideally on any smartphone, you should avoid full brightness for long periods of time.

With the display set to 50 percent brightness, the S3 battery dropped from 100 percent to 60 percent just after around 4 hours of streaming HD video over a Wi-Fi connection. By comparison, the HTC One X went down to 30 percent battery in the same test. So assuming that you don’t crank up the screen brightness all the way, you should be able to get 6 to 7 hours of video streaming on a single charge.

Expect to have to charge your phone every single night – perhaps even sooner if you’re a smartphone junky like me. Something interesting to note is that the Galaxy S3 charges a lot slower over a USB connection. So if you need a lot more power on a quick charge, I’d suggest hooking it up to a wall socket.

Samsung also included a “power saver mode” feature that automatically limits CPU performance, dims the screen, change the background color in web browsing and turns off haptic feedback (tactile vibrations).

But, you could argue that the whole point of getting the phone in the first place is to take advantage of these features, which then brings us to the question of whether a quad core processor isn’t overkill for a smartphone. But the Samsung S3’s performance does make it quite fun to use.

Final Verdict

With applications downloading and launching super quick, HD video playing smoothly and menus and gallery photos reacting simultaneously to your finger gestures, the Samsung Galaxy S3 has certainly proven itself as one of the top smartphones of 2012.



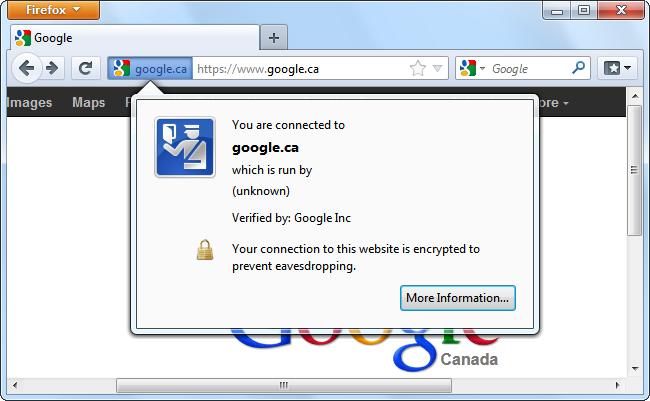
You’ve probably noticed that some Internet browsers like Firefox and Google Chrome now display verified company information to the left of an encrypted web address. This is an easy way to show that the website has an extended validation certificate, indicating that the site’s identity has been verified.

An extended validation (EV) certificate will not provide any additional encryption strength to a website.   Instead, it shows a user that extensive verification of a  website’s identity has already taken place.

How Web Browsers Show Extended Validation Certificates

You’ll see on an encrypted website that doesn’t use an extended validation certificate, Mozilla Firefox indicates that the website is “run by unknown.”

Google Chrome won’t display anything special indicating that the website’s identity was verified by the certificate authority that issued the website’s certificate.

When you’re on a website that uses an EV certificate, Firefox let’s you know that’s operated by a specific organization, and that information has been verified. According to this dialog, VeriSign has verified that we’re connected to the real PayPal website, which is run by PayPal, Inc.

Then when you’re connected to a website that has an extended validation certificate in Google Chrome, the organization’s name appears in your address bar. The information dialog tells us that PayPal’s identity has been verified by VeriSign using an extended validation certificate.

SSL Certificate Troubles

Standard SSL certificates provide very little verification of a website’s identity. Many years ago, certificate authorities would verify a site’s identity before issuing a certificate.  The certificate authority would check that the business requesting the certificate was fully registered, call the phone number, and verify that the company was a legitimate operation that matched its website.

Eventually, certificate authorities began offering “domain-only” certificates. These were a lot cheaper to get, as it was less work for the certificate authority to quickly check that the requester own a specific domain.

Phishers eventually figured out ways to take advantage of this. For example, a phisher could register the domain paypall.com and purchase a domain-only certificate. Whenever a user visited paypall.com, the web browser would display the standard lock icon, providing a false sense of security. Web browsers didn’t know the difference between a domain-only certificate and a certificate that involved the more extensive verification process of a website’s identity. As a result, public trust in certificate authorities to verify websites has fallen over the years.

This brings us to…

How EV Certificates are Different and Better

An extended validation certificate shows that a certificate authority has verified that a website is operated by a specific organization. For example, if a phisher tried to get an EV certificate for paypall.com, the request would be denied.

Unlike standard SSL certificates, only certificate authorities that pass an independent audit are permitted to issue EV certificates. The official Certification Authority/Browser Forum (CA/Browser Forum), a voluntary organization of certification authorities and browser vendors such as Mozilla, Google, Apple and Microsoft provide strict guidelines that all certificate authorities issuing EV certificates must abide by. This prevents certificate authorities from running another program where they utilize lenient verification practices to offer cheaper certificates.


The guidelines set by the committee demand that the certificate authorities verify the organization requesting the certificate is officially registered itself, that it owns the domain in question, and that the person requesting the certificate is in fact acting on behalf of the organization.

This involves checking through government records, contacting the domain’s owner, and contacting the organization to verify that the person requesting the certificate works for the organization. Extended validation certificates are, fundamentally, an attempt to restore public trust in certificate authorities and restore their role as gatekeepers against imposters and identity theft.


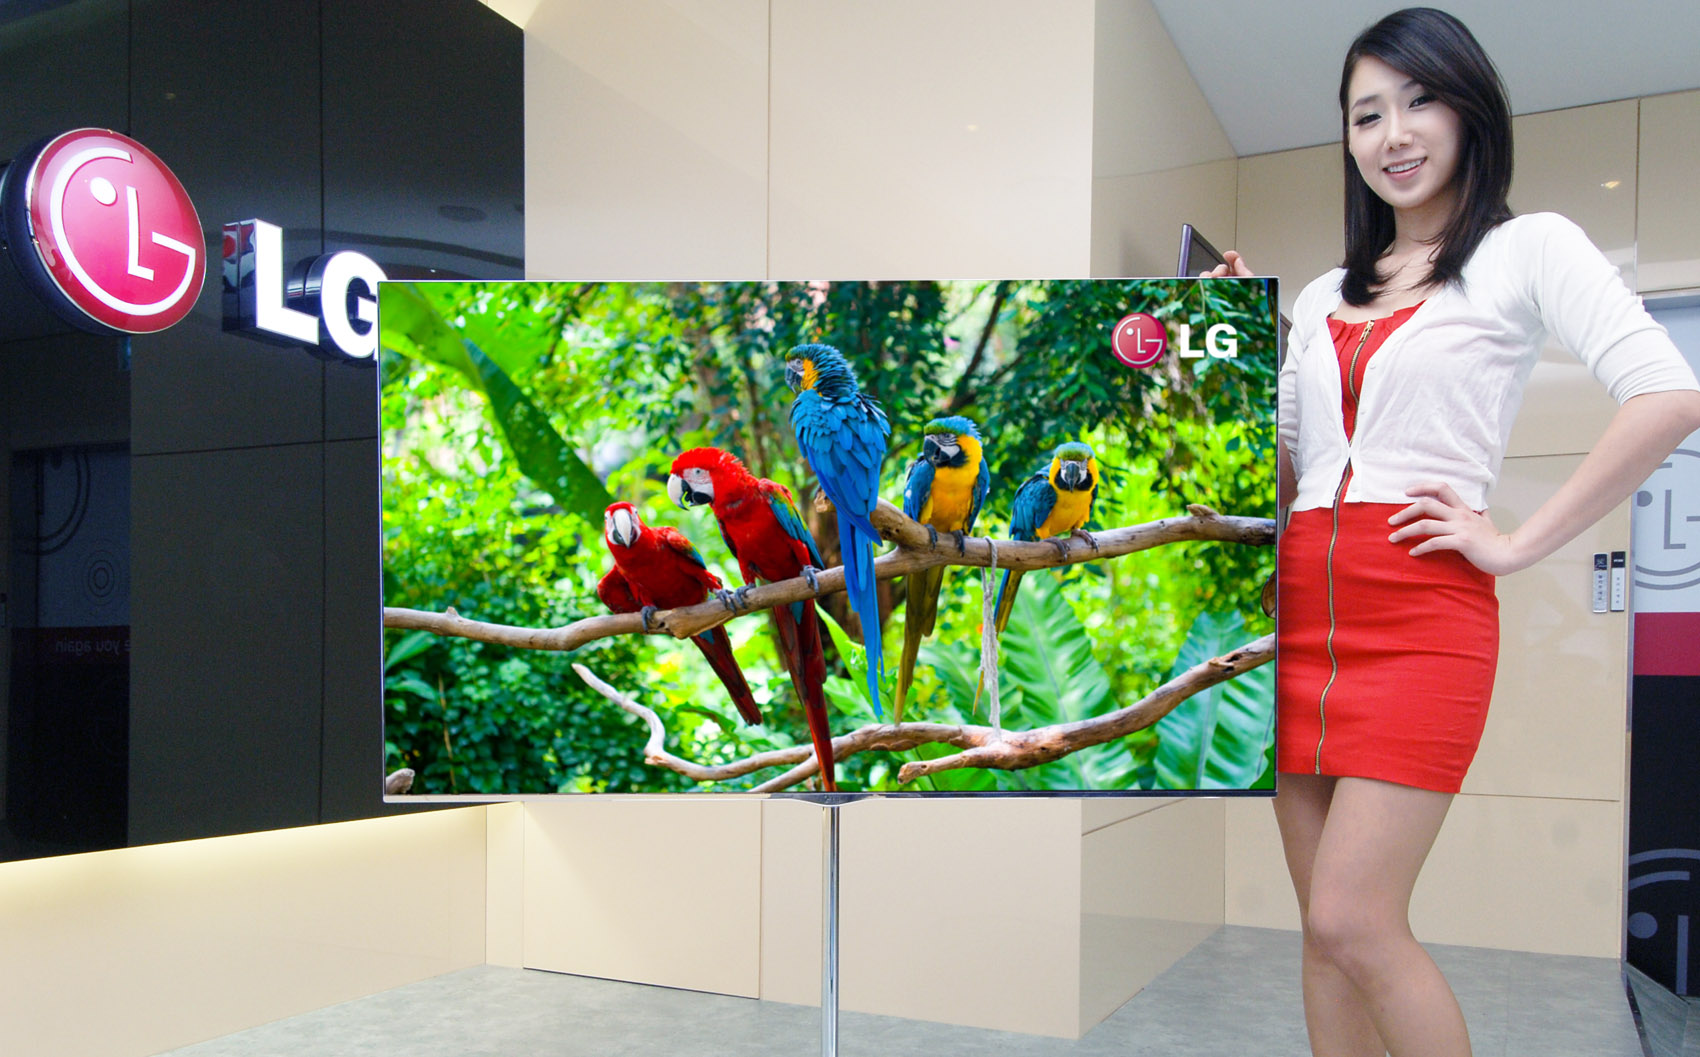
An LED TV is in fact a type of LCD TV. The only real difference between the two are their backlights. Instead of using an LCD TV’s compact fluorescent backlight,  and LED TV is outfitted with tiny, efficient, ultra-bright light emitting diodes. Not only are these displays impeccably vivid and bright, but they are also more energy-efficient and can be exceptionally thin because of the small size of the LED itself.

Although LED backlit TVs are more expensive overall, they generally offer far better contrast and inkier blacks. It would seem that as soon as we all were getting settled with our LCD TVs, along came the LED TV to make things even better. While LED TVs, both edge-lit and full matrix, might have their own set of unique disadvantages, most tech professionals and users agree that overall, the very best LCD TVs on the market use LED technology. So with that in mind, we’ve taken a look at all of the major LED TVs to come out this year and compiled this year’s list of the top 3 LED TVs of 2012. Enjoy!
 

Top 3 LED TVs of 2012

3. LG 47LW5600


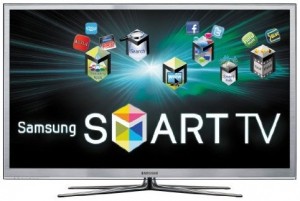
2. Samsung UN55D8000


1. Sony Bravia XBR-46HX929


3. LG 47LW5600

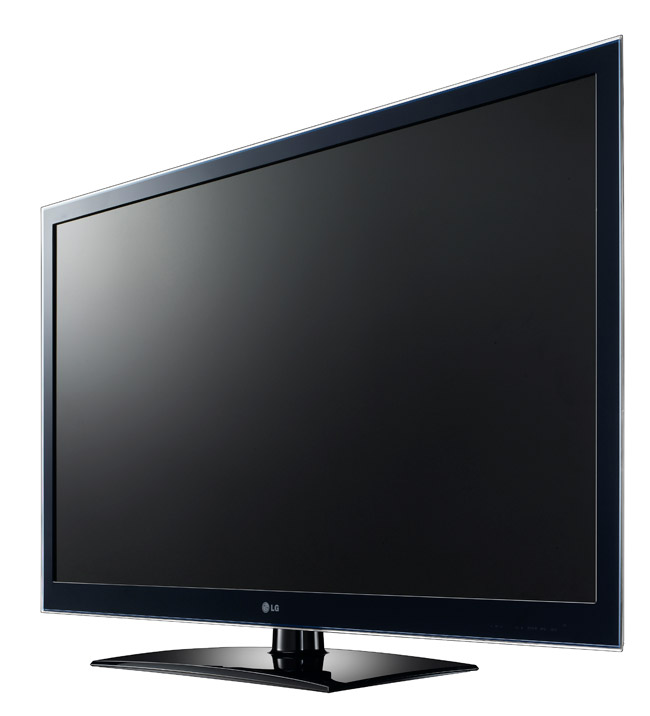
The LG 47LW5600 brings a top-notch digital 3D display to an affordable price range using its passive glasses technology.

What’s in the box?

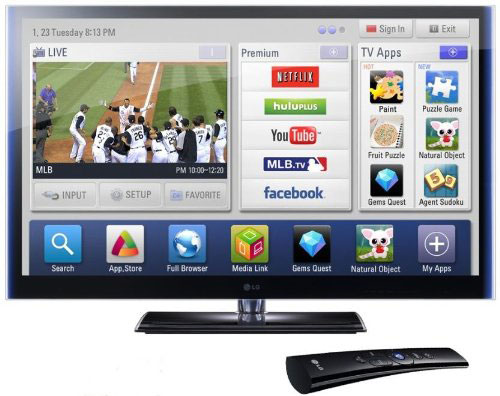
You’ll be getting the LED panel, a swivel stand and eight Phillips screws to put the two together. We were a bit surprised at how lightweight the stand really was, but as long as it met safety standards, the lighter, the better! The LED TV also comes with four 3D glasses, a wireless network adapter, and two remote controls.

The first is a standard remote with backlit buttons and the second is a Magic Motion remote with a strap that resembles a kind of Wii game controller. Finally, you’ll also have an owner’s manual as well as a digital copy too.  Once we got everything assembled, we connected a standard 3D Blu-Ray player and watched Avatar in 3D for what seems to be the gazillionth time.

Features

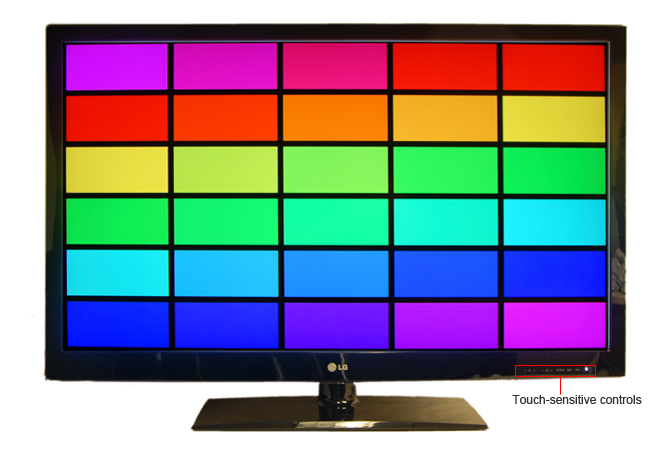
Based solely on outward appearances, the 47-inch LG 47LW5600 is just like any number of black-edged flat panel HDTVs, but it does have pretty sweet translucent edging. The screen is framed by a black bezel, so it doesn’t have the nicer floating pane of glass look that are popular with the premium LED TV sets.

But even then, the overall look is more than acceptable by our standards. Along the lower bezel is the 3D emitter, touch buttons for controls (you’ll probably never use), in addition to remote control and intelligent auto light sensors that dim the display when no one is around to watch the TV.

Down-firing stereo speakers at the bottom of the panel are rated at 10 watts apiece, but it lacks the subwoofer you usually would find in the high-priced models. This LG HDTV model measures 43.9 x 26.9 x 1.2 inches and weighs 40.8 pounds. On the left side of the set is a jack pack offering two USB inputs and four HDMI inputs. The back has the usual component, A/V, RS-232C, RGB-in Ethernet and other connections that should cover all the various gadgets you’d want to hook up to a TV without any issues. The only noticeable thing left out was an SD card slot that would have been handy for photographers.

Performance

One of the latest controversies to come out of the tech world lately seems to be the battle between active and passive 3D HDTV technology. LG, Vizio, and Toshiba jumped the passive boat, while almost all the other major HDTV manufacturers stayed with the active shutter glasses system.

The active-shutter system, also known as “Full HD” 3D technology, does have a higher quality 3D image, costs a whole lot more, and requires expensive, heavy 3D glasses. On the other hand, the passive system uses cheaper and lighter 3D glasses just like the pairs you get at your local movie theater. The HDTV itself also costs a lot less, but finely-detailed 3D resolution isn’t really as good. The technology is known as “Film Patterned Retarder”, or FPR. LG refers to this passive 3D tech as “Cinema 3D”. You can do your own research into FPR technology, but basically from what we gather passive just lets you watch 3D at home for a far better price.

The LG 47LW5600 is a 1080P 120Hz HDTV featuring Led Plus with something called “local dimming” – LG’s term for ledge-lit Led backlighting with 12 addressable segments for the 47-inch edition. We’ve like the results of this technology versus traditional CCFL LCD TVs since it’s narrowed the quality gap with plasma displays, which still remain on top. Black levels, contrast and color rendition are improved with this TV’s LED technology. The panel is a whole lot lighter and thinner as a result, while energy-efficiency is a whole lot better too.

The main remote control is pretty straightforward, with a backlit button layout that’s made just for basic television controls. Although the LG 47LW5600 doesn’t have official THX certification, the HDTV has two ISFccc settings so that you can use the Picture Wizard II to calibrate your TV set. We checked out the standard and cinema modes too, while the Intelligent Sensor setting adjusts parameters for ambient room light. The set also comes with a Magic Motion controller that acts as an almost-buttonless remote for navigating through menus. The menu display itself is decent, not having anything particularly bad or good to say about it. As soon as the Magic Motion controller is synced, a cross will appear on your TV screen when you aim it at the display, acting kind of like a computer cursor.

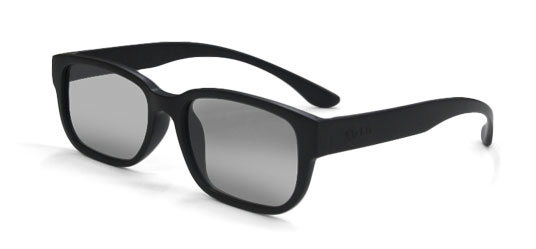
Sitting back about 2 meters from the screen, we watched scenes from Avatar on the LG Cinema 3D. What’s cool about the 3D glasses is that you don’t have to turn them on at all, or worry if they’re functioning properly or have enough power for a long viewing. Also, the surrounding room doesn’t completely dim which occurs when active shutter technology kicks in. This subtle darker look is not anything to worry about, just a little different. What’s really cool is that the flicker-free LG glasses are extremely lightweight, comfortable and there are no problems about recharging the glasses or changing batteries. Not to mention they’re very cheap. You could even use those Real3D glasses you use at a movie theater.

All of our doubt about the passive 3D technology disappeared as soon as we began watching the opening menu scene of the Avatar 3D Blu-Ray. It really looked great – crisp and eye-popping. Skipping through to take a look at the more action-oriented scenes, we have to admit being very much impressed by the arrows, bullets and gas canisters popping off the screen. The only downside is that just like at the movie theater, you can’t move around with the lighter glasses and still watch the 3D. The effects get all jumble as soon as you move your head  a lot to the side. Sure, the effects weren’t as good as the pricier 3D LED TVs we’ve seen, but the shear price difference as compared to quality is just outstanding. And that’s why it’s made it in at number 5 at our list of the top LED TVs of 2012.
 

2. Samsung UN55D8000
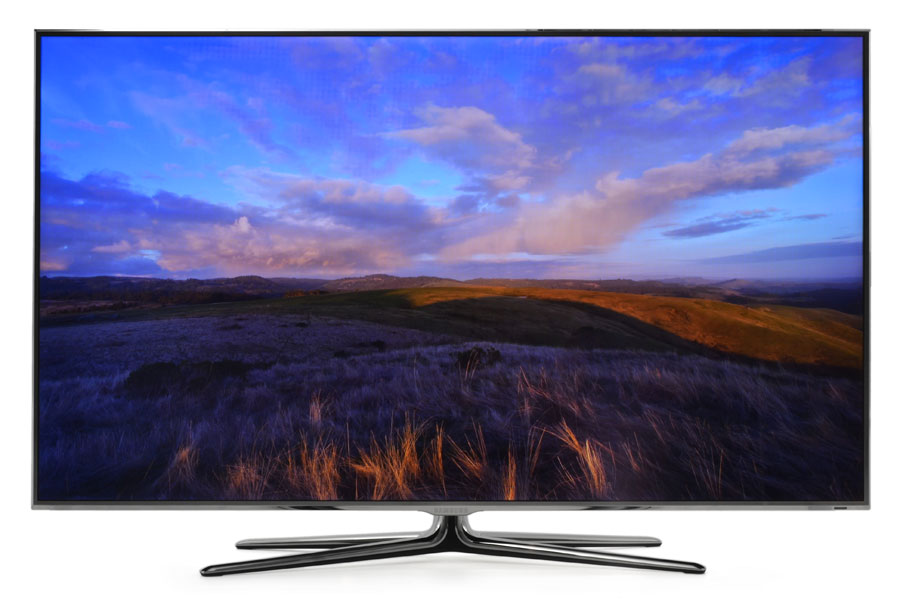
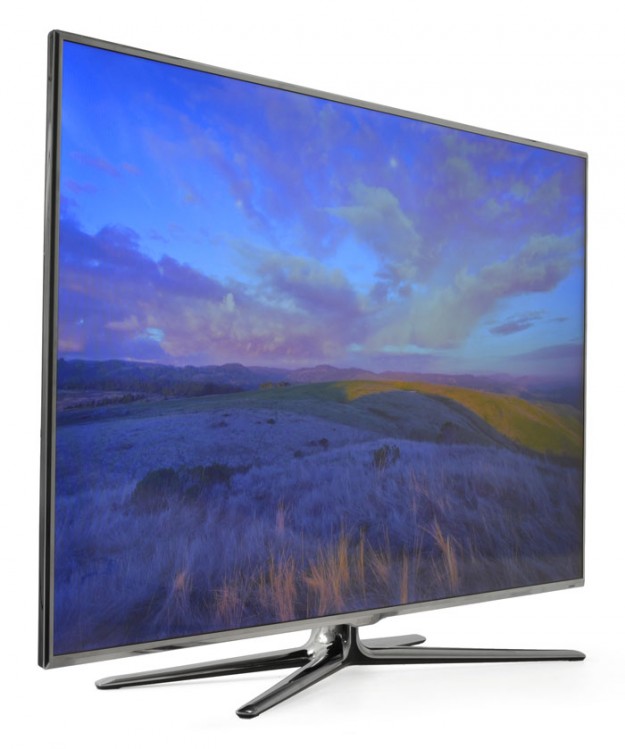
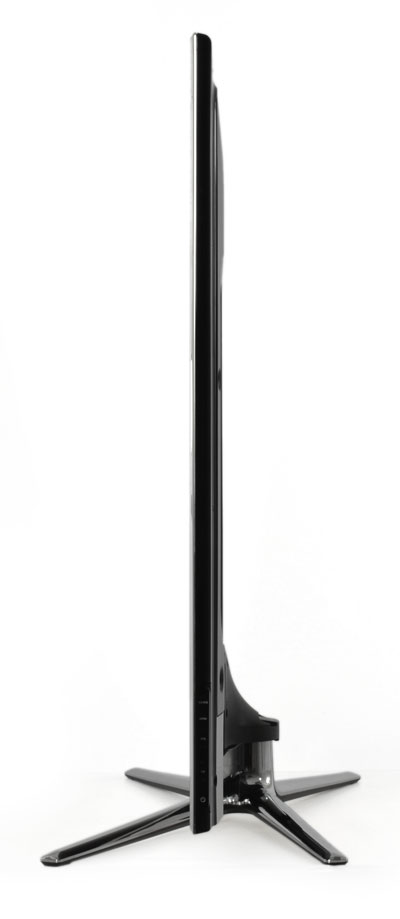
The Samsung UN55D8000 has a beautiful picture quality with an incredible thin display. Anyone who’s been TV shopping recently at their local electronics retailer has undoubtedly seen the Samsung D8000 series at one point. It’s really hard to miss it, considering its almost non-existent bezel display and super thin frame. We’ve found that once people lay eyes on the Samsung UN55D8000, it’s really hard to look away. You just get stuck staring at it, probably until your significant other finally finds you and drags you out of the store.

What’s in the box?

The Samsung UN55D8000 weighs in at an impressively light 35 pounds and measures  48.5 x 27.8 x 1.2 inches. Yes, it’s only 1.2 inches deep. There’s not a whole lot to grab onto when you’re pulling this bad boy out of the box so I’d suggest have a friend with you to help get it set up. In addition to the display there is an x-shaped TV stand and a two-sided remote control, and the usual suspects when it comes to paperwork. Lastly, two active 3D glasses are included as well.

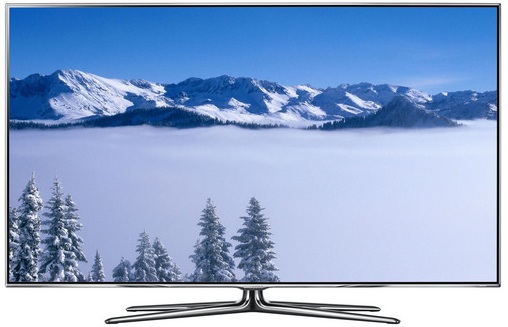
Putting it all together with the stand is fairly straight forward, and we like that the TV sat a lot more securely than many other LED TVs we’ve seen. The only real downside is that the actual look of the stand is not on par with the rest of the TV in terms of quality and aesthetic appeal.  The stand tries to copy the chrome bezel appearance, but while the bezel of the TV is made of solid looking and feeling metal, the stand has a kind of cheap plastic feel with a low quality chrome finish.

The bezel itself is a whole lot smaller that it looks online and in commercials. We had already taken a look a quite a few reviews online with plenty of photos, so we had an idea of what to expect. But when we finally came around to seeing it for ourselves, it was just unbelievable how crazy thin the bezel actually looked.  It looks very nice even on its own, without turning anything on. But of course when we finally fired it up the added effect of the picture took the experience to all new heights.

The wafer-thin bezel has an illuminated Samsung badge on the bottom center of the set. The badge is extremely bright on its default setting, somewhat unsettling because of the bezel’s overall subtlety. But luckily this light setting can be adjusted to be a whole lot dimmer (we went a step further and just turned it off entirely).

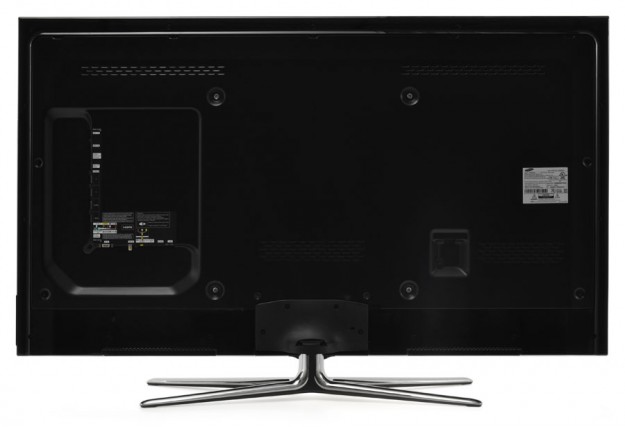
One of the biggest drawbacks to making such a thin HDTV is that you basically run out of room to put the essential inputs. You have only a very shallow inset on the back that accommodates the LED TV’s only bay of inputs and outputs. So for the Samsung UN55D8000, that translates to a little extra work to connect HDMI cables.

Even worse, these inputs become even less accessible when wall mounted. That includes the three USB ports which would probably need to be accessed after the set is installed on a wall. Samsung definitely missed the ball on that note.

Features

The Samsung UN55D8000 comes with all of the latest technology and features from Samsung. It’s would take way too much time to cover them all, as it’s an article in it of itself, so we’re just going to touch on some of the more important ones.

The Micro Dimming Plus feature is Samsung’s main local dimming component. For those of you who are not familiar with local dimming, it lets certain sections of the backlight to be dimmed while others are left to shine at full brightness. This give the display a better contrast and brightness that is most noticeable accompanied by a dark background with bright areas interjected onto the picture. On regular HDTV sets, the area around the brighter spots is gray and even darkish blue instead of black. With Samsung’s Micro Dimming Plus, you get a much more accurate picture overall.

In this model, Samsung incorporated edge lighting along the left and right sides of the TV display, rather than along the top and bottom edges. This allows letterbox bars to be darker and more uniform. The set has a full 1080p resolution with 3D capability, with a built in 2D to 3D conversion feature. The Smart Hub is an interface for accessing all the internet essentials. With it, you get Netflix, YouTube, Hulu Plus, Facebook, Twitter, and a whole long list of other cool applications with and integrated search engine as well.

As for DLNA compatibility, AllShare is Samsung’s solution. It’s a lot faster and simpler to work with than other DLNA interfaces we’ve seen. With AllShare, you can stream files over the cloud from devices like your smartphone, tablet, and PC. The main thing that got us hooked was how easy it was to use.

Trying out our Galaxy Tab as a remote control, we were able to access media not just on the Tab, but from every other DLNA device within the same cloud network. The Samsung UN55D8000 gives you the choice of a wired Ethernet connection through an LAN port or its built-in 802.11b/g/n wireless adapter.

Samsung advertises its “Ultra Clear Panel” as being resistant to the effects of ambient light. In a way, this means that the panel absorbs bright lights in order to minimize wash-out and keep the picture looking super clear. We did get a little light refracted from the windows, but overall Samsung stayed true to its word.

Performance

The Samsung UN55D8000 out-of-box picture quality was a little below par we have to admit. But this was easily explained by its default settings. Fortunately, some slight adjustments to brightness and contrast brought it to something really worth seeing for yourselves. Colors were much more accurate, but remained vivid. The balance between brightness and contrast was much improved, as well.

With the adjustments finally made, we once again checked out Avatar. We noticed some unbelievable texture detail in the skin of both the humans and the aliens. The film is loaded with all kinds of blues and greens and the set did very well reproducing all of them, catching even the subtlest of hue differences.

The foggier scenes went by without any obvious banding, and this is probably the best we’ve seen from any other TV in this respect. Without any additional help from Samsung’s motion smoothing technology, we felt that the motion was both smooth and natural, with hardly any noticeable judder or motion blur.

The TV’s Netflix and Hulu Plus media rendering was equally, if not more, impressive. HD versions of some popular TV shows looked incredibly smooth and well resolved – a whole lot better than we’ve seen on any other HDTV. We also really enjoyed the informational interface bar that let us know that we were watching HD or standard definition, depending on our bandwidth at the time.

The 3D performance on the Samsung UN55D8000 was very good to say the least. Not too much crosstalk, and the color really came through the tinted, active 3D glasses. The display gave a confirmation with our glasses were connected and let us know that 3D content was sensed. We may not be huge fans of active 3D, but we felt that on this television really provided a picture that was stunning. It just felt a whole lot easier and smoother to watch 3D on this TV. With its super-thin bezel, the Samsung UN55D8000 takes on a window-like quality in its 2D mode. Truly something to just sit back and look at.


1. Sony Bravia XBR-46HX929


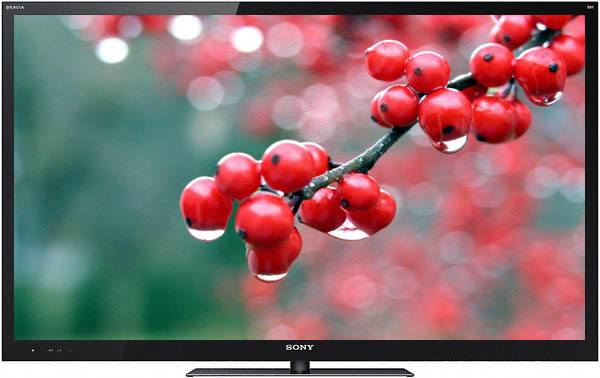
The Sony Bravia XBR-46HX929 tops our list with near-perfect contrast ratios and color through local LED dimming, making it one of the very best mid-size LCD TVs on the market today.

This model features the latest local dimming technology, a feature that attributes to its near-perfect contrast and black levels that can even surpass that of some plasma TVs. Of course, premium technology does mean a hefty premium retail price, but its feature set and sheer performance potential makes the Sony Bravia XBR-46HX929 an extremely attractive option for those looking to get all the cinematic performance of a plasma in an efficient and super-slim LCD sized package.

What’s in the box?

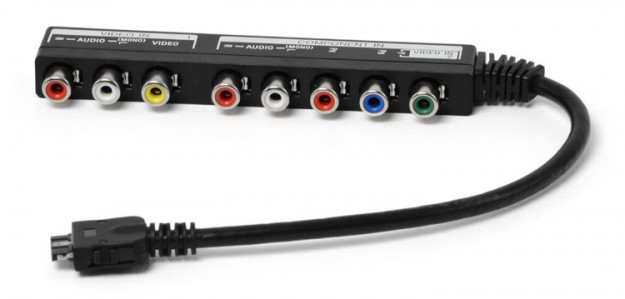
The Sony Bravia XBR-46HX929 comes in a considerably smaller package and weighs in at around 42.8 pounds. With it, you’ll be getting the display, a stand, a component video/AV dongle, power cord and the usual bells and whistles of user manuals and paperwork. Putting the display and stand together was no major project at all, although the overall stability of the final product was a bit less than we had hoped for.

Features

The display for this model is simply incredible. The bezel may have been a bit thicker than the Samsung, but there was something inexplicably attractive about the way the glass panel merged with the edging into one seamless piece, keeping its surface utterly flat for a final product that’s seemingly edgeless. Apart from its barely noticeable status LEDs, only the Sony logo breaks up an otherwise flawless front surface.

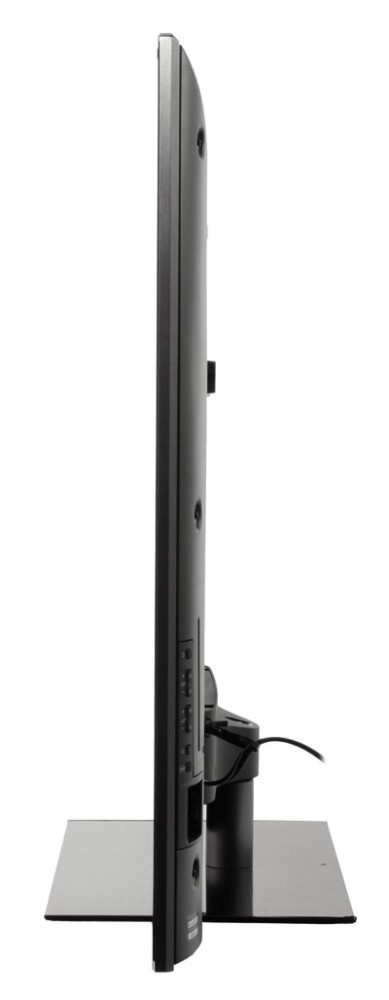
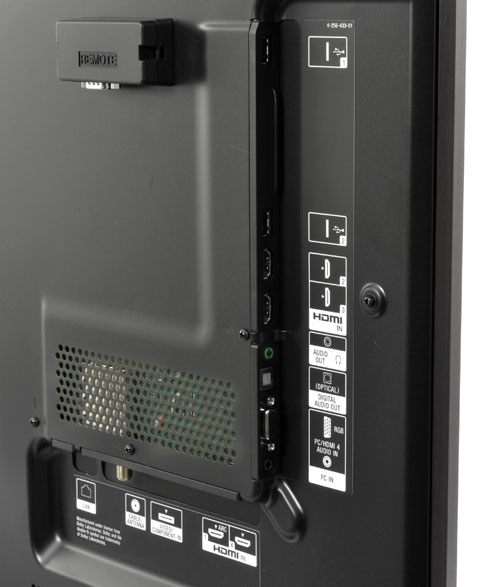
The rear to the display is almost as flat as the front, save for an RS-232 box that adds a little unnecessary depth to the set. As for its connectivity, Sony got it all right. We were able to find two USB ports, four HDMI inputs, PC video and audio inputs coaxial cable input, and Ethernet jack, optical digital audio output, headphone output and a space to connect the provided dongle for old-school component video and composite jacks, should you want those connections. All of the inputs are split up between the lower back portion of the back panel and the upper left side for a those discreet cable connections for easy access.

Within it, Sony has packed a whole bunch of extras as well as suite of Internet content applications. We really love the presence sensor, which uses a built-in camera to monitor the room for any subtle movement. If there isn’t any sort of movement for a specified duration, the display turns off. It also displays a big warning sign if someone gets to close for safe viewing. That same sensor works with the TV’s optional ambience sensor to modify the brightness according to lighting conditions and can adjust picture based on viewer position in the room as well.  As for internet content, Sony offers built-in Wi-Fi to get at them if an Ethernet cable isn’t available. Netflix, Amazon VOD, YouTube, Hulu Plus, Pandora – just to name a few.

We also really enjoy the remote control Sony offers with its series of TVs. A power button located a third of the way up on the back of the remote is actually a really nice touch, as is the large navigation wheel near the front. Most of the critical buttons are illuminated by the remote’s blue back light, but the button that launches the back light isn’t ergonomically placed to be honest.

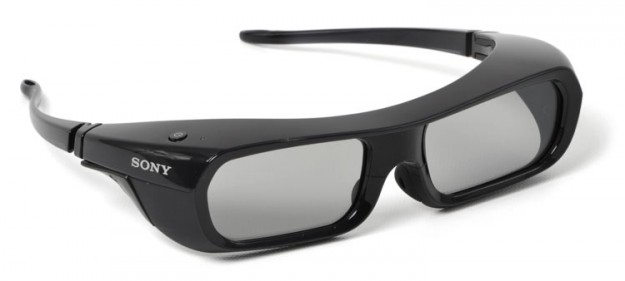
Although you can view full 3D picture at its 1080p resolution, the active-shutter glasses needed to enjoy it are not included. At its retail asking price, we really would have expected to see at least a pair included, maybe even as a promotional gift in the very least, but for now, expect to dish out about 70 bucks a pair. But on the plus side, the glasses are USB rechargeable much like the Sony PS3 controllers.

Performance

For video content review, we stuck with our trusty Avatar Blu-Ray, but we also spent quite a bit of time streaming YouTube and Netflix videos, as well as video and music stored on a networked computer.

We spent enough time calibrating to come to the conclusion that the Sony Bravia XBR-46HX929 performs extremely well right out of the box, although is standard picture setting was a little on the brighter side and colors were a bit intense. We did find that the display’s cinema setting offered a more natural picture very close to our own manual calibration, but we found ourselves actually preferring some of the TV’s brighter settings during out tests in rooms with lots of windows and sun exposure.

In a nutshell, the Sony Bravia XBR-46HX929 offers one of the best picture qualities we’ve ever laid eyes on. The black levels on this model are unbelievable, as was its high contrast ratio. Color accuracy was a close to flawless as possible in today’s market, pulling off the smallest fine graduations between oranges and browns in some of our usual testing materials that we’ve never noticed on any other LED TV before.

We also found the reds on this display to be some of the very best we’ve ever laid eyes on, surpassing that of many high-end plasma TVs as well. We spent hours on this Sony model and were consistently impressed by how engaging and aesthetically satisfying picture quality was.

3D performance was something to marvel at as well. Where we would usually notice some flicker other 3D systems that rely on active shutter glasses, the Sony Bravia XBR-46HX929 remained flicker free and the image, beyond the eye-popping 3D, was still razor sharp with excellent color and contrast. We usually work pretty fast through some of our previous 3D evaluations, but we actually very much enjoyed the effect this time and found ourselves lingering on Avatar 3D a little longer than we had to.


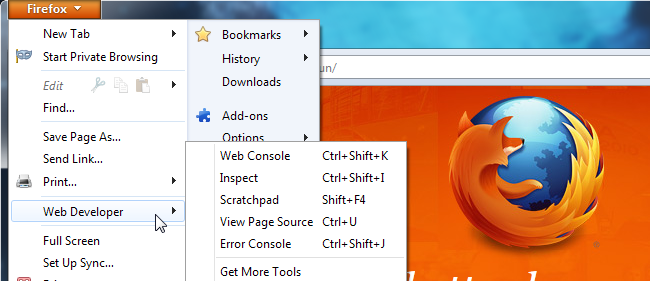
Mozilla Firefox’s Web Developer menu has tools for inspecting internet pages, running JavaScript code, and viewing HTTP requests and other relevant messages. In this tutorial you’ll learn about Firefox’s all-new Inspector tool and updated Scratchpad.

Mozilla Firefox’s new web developer features, combined with top of the line Firefox web developer addons like Firebug and Web Developer Toolbar, make Mozilla Firefox the ideal internet browser for web developers. All of these tools are available absolutely for free under Web Developer in Firefox’s menu.


Page Inspector

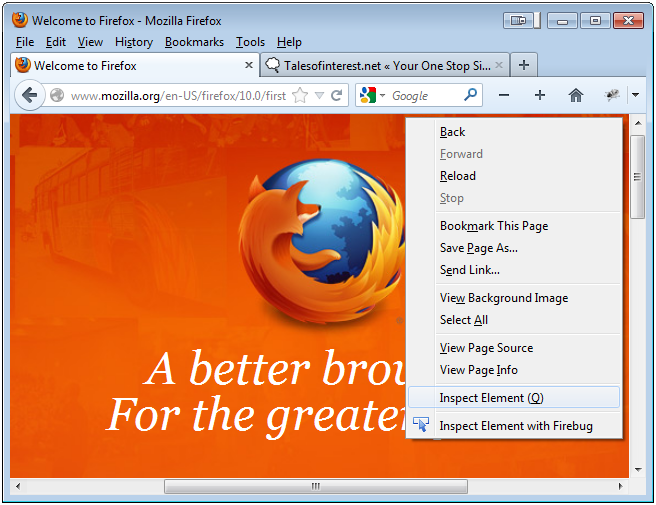
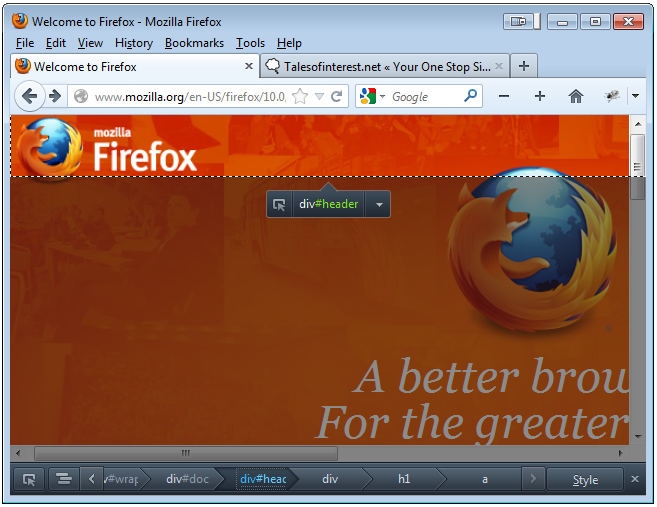
You can inspect a specific element’s code by right-clicking it and selecting Inspect (or by pressing Q on your keyboard). You can also launch the Inspector right from the Web Developer menu.

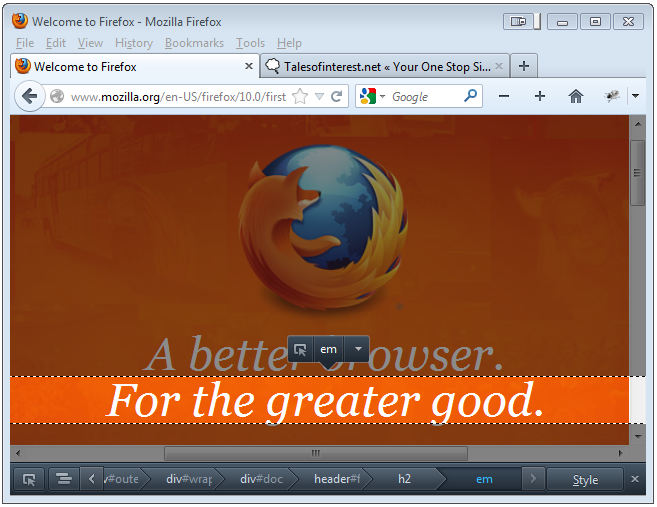
You will then see a toolbar at the bottom of the webpage, which you can then use to control the Inspector and check out all the elements on the page. Your selected element will be highlighted and other elements on the webpage will be dimmed out.

If you want to select a new element on the page, click the Inspect button on the toolbar, hover your mouse over the page and click you element. Mozilla Firefox will then highlight the element under your cursor as you maneuver it across the page.

You can also go back and forth between parent and child code elements by clicking the breadcrumbs on the Inspector toolbar.

HTML Inspector

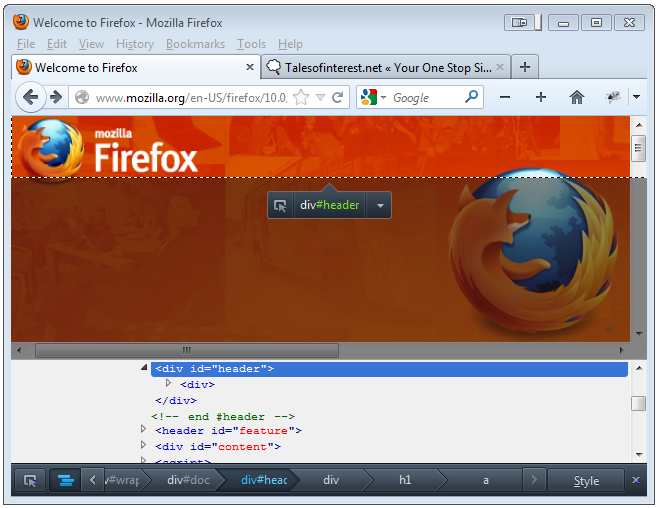
Click on the HTML button to view the HTML code of your selected element.

The HTML Inspector will allow you to expand and collapse the HTML tags, making it easy to visualize your changes right on the page – very similar to WYSIWYG software like Adobe Dreamweaver.

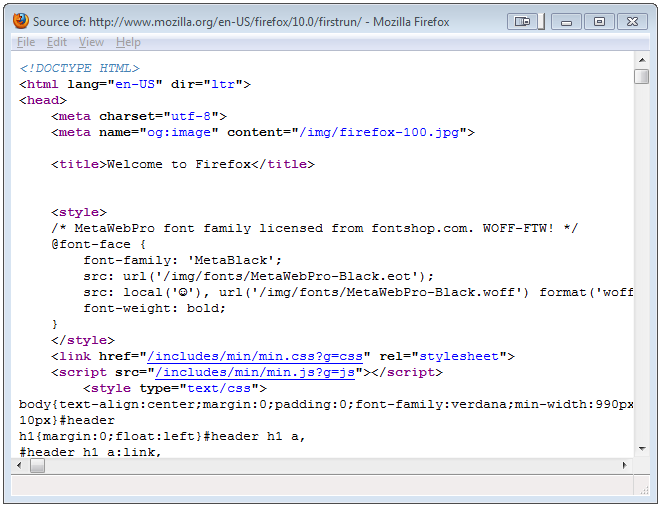
If you want to see the webpage’s HTML in a flat file, you can also select View Page Source from the Web Developer Menu. (Remember to bring up the Web Developer Menu just use your cursor to right-click anywhere on the webpage).

CSS Inspector

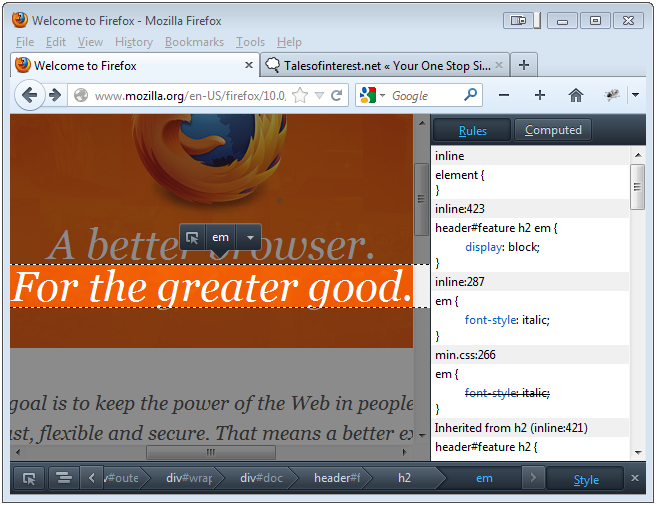
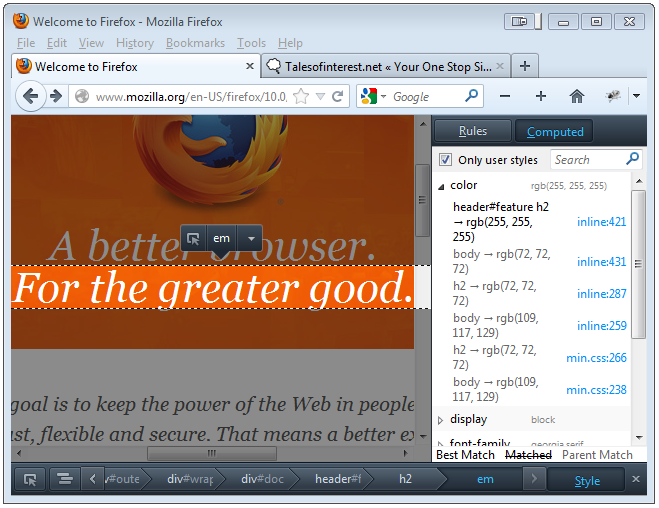
Click on the Style button to see the CSS rules that are being applied to the selected element and there’s also a CSS Computed panel.

You can switch between Rules and Computed by clicking the Rules and Computed buttons. To help you find specific CSS properties, the computed panel includes a search box.

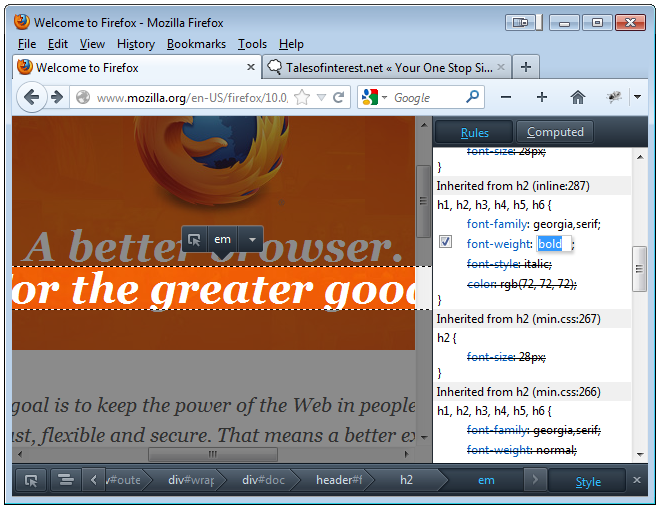
You can also edit the element’s CSS straight from the Rule panel. Uncheck any of the check boxes to temporarily deactivate the rule, click the text to change a rule, or add your own rules to the element at the top of the panel. Here, we’ve added the font-weight: bold CSS rule, making the element’s text bold.

JavaScript Scratchpad

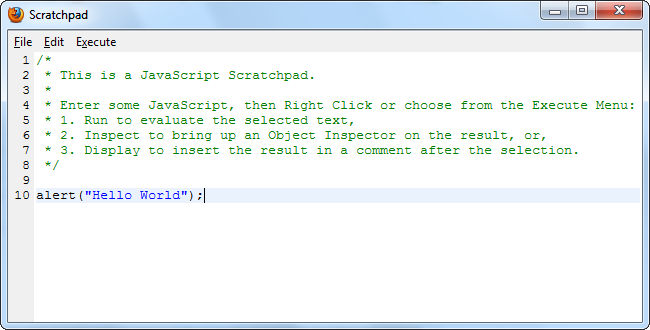
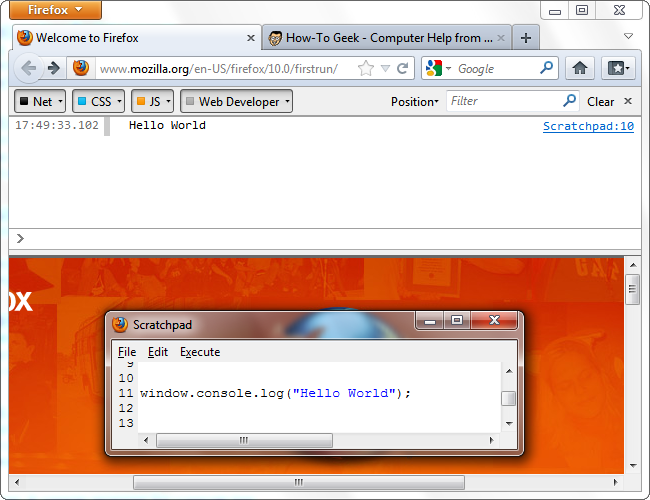
The Scratchpad also saw an update with recent versions of Firefox, and it now contains syntax highlighting. You can type in JavaScript code to run on the current webpage.

As soon as you have, click the Execute menu and then select Run. The code runs in the current tab.

Web Console

The new Firefox Web Console replaced the old Error Console, which has been belittled by users and removed by Mozilla developers in the latest versions of Firefox.

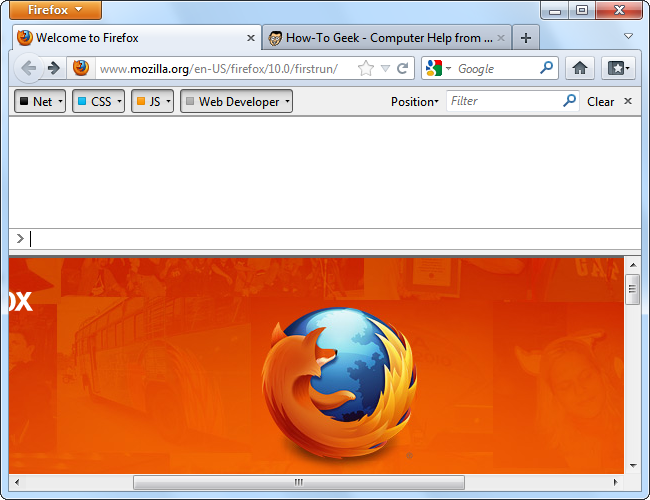
The Web Console displays 4 different types of messages, which you can then toggle the visibility of – network request, CSS error messages, JavaScript error messages and web developer messages.

A web developer message is a notification printed to the window.console object. For example, you could run the window.console.log (“Hello World”); Javascript code in the Scratchpad to print a developer message to the console. Web developers can integrate these messages into their JavaScript code to help with debugging.

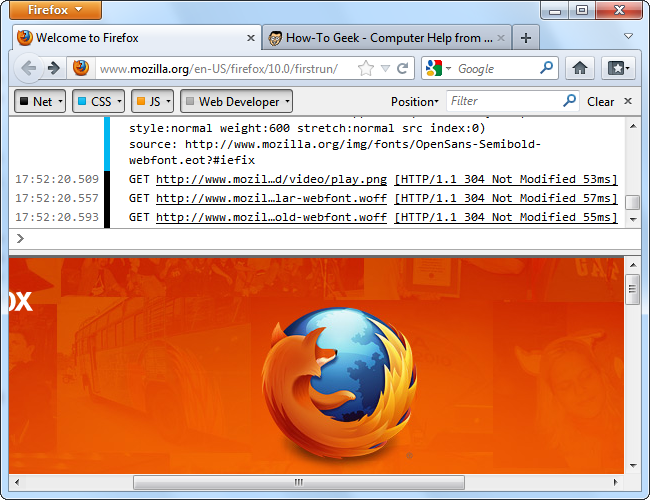
Refresh the webpage and you then see the generated network requests and other related messages.

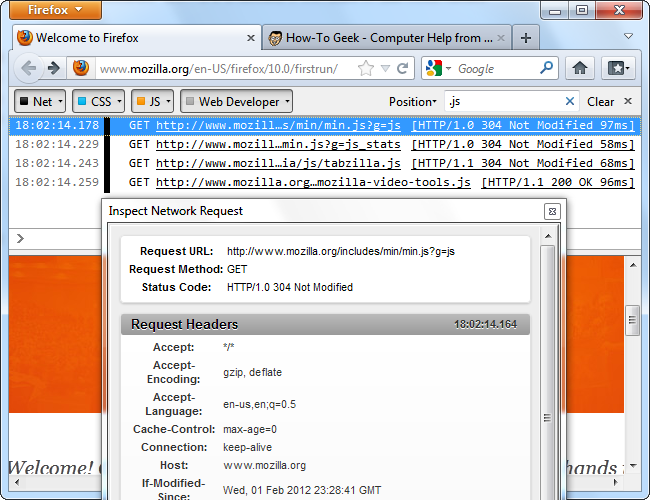
Use the search box to filter the messages; click a request if you want to see more details.

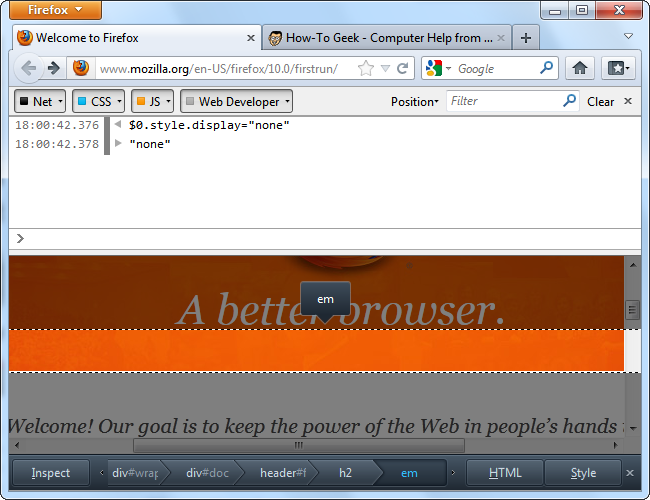
With recent versions of Firefox, the Web Console can work in tandem with the Page Inspector. The $0 variable stands for the currently selected object in the Firefox Inspector. So, for example, if we wanted to hide the currently selected object, you could run $0.style.display=”none” in the console.

If you are interested in learning more about using the Web Console and its various built-in functions, check out the Web Console page on Mozilla’s Developer Network website.


The best computer for digital photographers maximizes performance and storage capacity while simplifying workflow.

So what do I mean when I say photographers? Well you should probably love taking photos for one. You most likely carry your professional camera along wherever you go – just in case. You’re always on the lookout for brand new Photoshop filters or useful editing applications and you upload tons of photos a year on Flickr or your other image hosting accounts.

If that sounds a lot like you then I’ll be showing you how to choose a computer that is responsive and fast for editing, storing and displaying your photos.

Whether you decide to build your own computer or purchase one already built, there are quite a few things to consider that are essential to choosing the best components for what is considered a “photographer’s” computer. You definitely want great storage capacity, a high performing CPU and graphics card, and finally a good monitor.

Every Photographer is Different

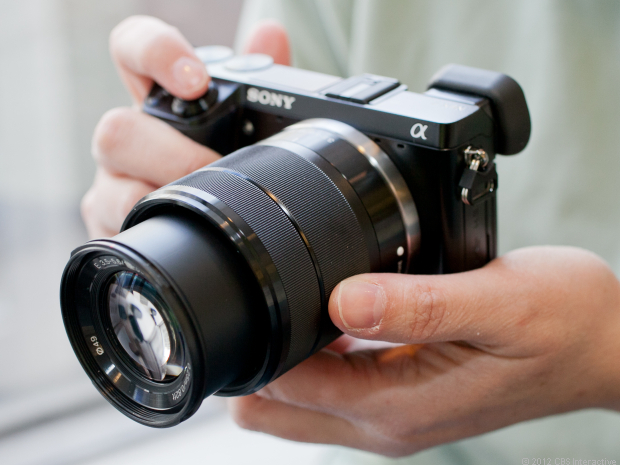
All photographers have varying shooting styles, workflow needs, and attitudes towards photo editing. Right now I’m working with a Sony Alpha NEX-7, and I shoot almost exclusively in raw image mode.

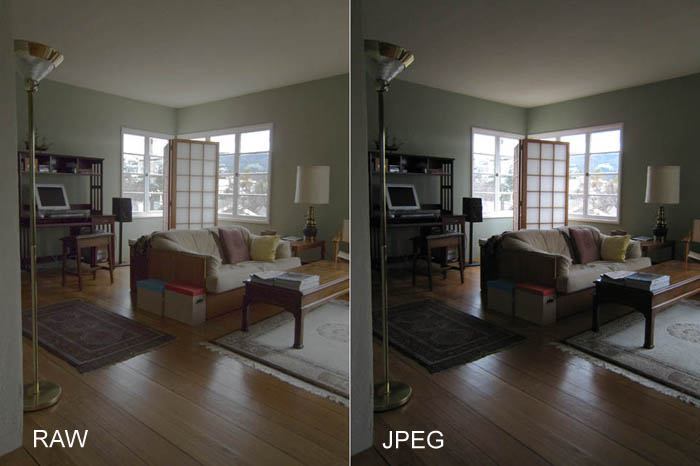
Raw image format captures the pure sensor data on a DSLR camera, issuing no compression or modification on the data it collects. That basically means large files, and a image editor that plays nice with Sony’s raw format.

Whatever camera you use, a good computer for editing a storing digital photos will have a few common elements. Photo editing, especially involving HDR and noise reduction effects, requires excellent CPU performance. If you’re going to save most of your photos, you’ll need a large storage capacity. If you’re editing large raw photos, more memory will help. Don’t forget about getting a good monitor too to display your images as clearly as possible.

Graphics Card (GPU)

Graphics cards don’t only serve to speed up your display and scroll the canvas, but they also act as a parallel compute engine for a number of powerful editing filters, especially blur filters.

Photo editing programs are rapidly incorporating GPU acceleration into their system. Most of these programs use OpenGL and OpenCL, two main software programming standards. OpenGL is mostly for graphics, while OpenCL lets software developers use the GPU for generic parallel compute tasks, such as blur filters mentioned before.

Just to give you an idea, the popular Photoshop CS6 utilizes both OpenGL and OpenCL, while Corel AfterShot Pro uses the graphics card to help in file-format conversion. Programmers have also built an entire photo-editing software called MuseMage that primarily uses GPU acceleration.

With that in mind, you don’t really need a premium $400 and up graphics card to run with your photo editing. If you’re not playing any PC games as well on the computer, then you’ll be fine with a mid-range GPU.  You can find an AMD Radeon HD 7770 for around $200. Or if you want something with a little more oomph, an AMD Radeon 7850 will cost your around $250, and it can hold its own with PC gaming too.

Nvidia GPUs will work good too, but I’d suggest going with AMD more because they enabled their OpenCL drivers. Remember that OpenCL is the programming standard for graphics compute tasks, such as Photoshop blur filters. But that could very well be incorporated into Nvidia graphics cards sometime in the future.

CPU and Memory

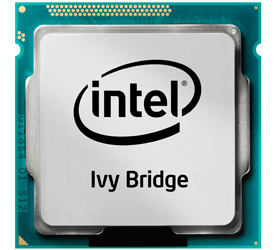
As a basic recommendation, I’d suggest the Intel Core i7-3930K CPU. The 3930K CPU contains 6 cores, can execute 12 simultaneous threads, and is built on Intel’s 32nm manufacturing process. That might be a little much for some users, so a good alternative is the Core i7-3770K, which is part of Intel’s new Ivy Bridge line processors.

Running at 3.5GHz, the Core i7-3770K runs 4 cores and up to 8 threads. It’s very power efficient and costs around $350. I recommend the Intel Core i7 processors because they support Hyper-Threading in addition to offering large L3 caches, which improves performance in most photo editing software.

As for the memory, if your editing plenty of raw images, I’d recommend 16GB of RAM, since 14-bit raw images range from 45MB to 48MB each, and consume a lot more memory during editing. Besides, today’s memory prices are pretty low anyway so I’d recommended going as high as possible.

Storage

If you’re shooting tons of raw images, you’ll definitely want tons of storage. You may not be using the Sony Alpha NEX-7, but even 12 megapixel raw images take up at least 10MB of disk space each, while 12-bit, 16 megapixel images consume 14MB to 16MB each.

Now when it comes to storage on your photographer computer, don’t save images on the boot drive if you can work around it. At the very minimum, I’d recommend using two drives on your computer. A great combo would include an solid-state drive (SSD) for a boot drive and a large capacity hard disk drive (HDD) as secondary storage. Even if you’re running an HDD as your boot drive, having two physical drives will always improve overall system performance.

Monitors

A good monitor for a photographer’s computer can be calibrated to be color-accurate. No display is perfect, but some offer far better color fidelity than its counterparts. In general, I’d recommend using high-quality monitors with IPS or IPS-based LCD technology.

Unless you’re working on professional level photo work, you won’t really need a premium monitor, but you still definitely want a display that will support true 8-bits-per-pixel color. You can find good-quality 24-inch IPS monitors supporting 1920-by-1200-pixel resolution for under $400.


To Benchmark means to evaluate your PC’s performance using multiple tools and utilities specifically designed to analyze each major component.

In this tutorial, we will show you which programs are best, and draw out how to get results that are both reliable and repeatable, and explain how everything is calculated.

Running a Benchmark on your computer allows you to evaluate its performance, identify potential bottlenecks and choose the right system upgrades. Although general CPU and memory upgrades may help in some situations, it often makes more sense to upgrade the storage subsystem or the graphics board if you’re looking for perceptible improvement in system responsiveness or gaming performance.

If you ran a number of Benchmarks and identified which components were holding your system back, you would be able to choose the most effective upgrade for your current system.

There are a number of different kinds of Benchmarks available for evaluating a system’s performance. Some use synthetic tests that don’t really reflect real-world usage, while others use scripted tests that rely on actually applications and simulated real-world workloads. There are some Benchmarks that assess the performance of a single computer component, while others calculate total system performance. To best determine the overall performance of a PC, try running a combination of these Benchmarks, based on your usage patterns.

Individual Component Benchmarking

There are many components in a computer systems that contribute to its overall performance, but the CPU, memory, GPU, and storage configuration generally have the biggest impact. Deciding on which components are most important for you to consider depend mainly on what you’re using your PC for. A casual user who wants a more responsive PC would benefit from upgrading a slower hard disk drive to a fast solid state drive. A gamer who wants the best frame rate would probably be better off with a faster GPU than memory. It’s up to you which aspects of system performance are most important to you.

CPU

The best CPU Benchmarks put a heavy amount of stress on the CPU while it minimizes the influence of other system components. SiSoft’s SANDRA 2012 uses a few CPU-centric synthetic benchmarks that test a chip’s performance with various mathematical workloads. The tests are multithreaded and generally scale with higher-clocked speeds and more CPU cores. SANDRA also provides results from other CPUs for easy comparison.

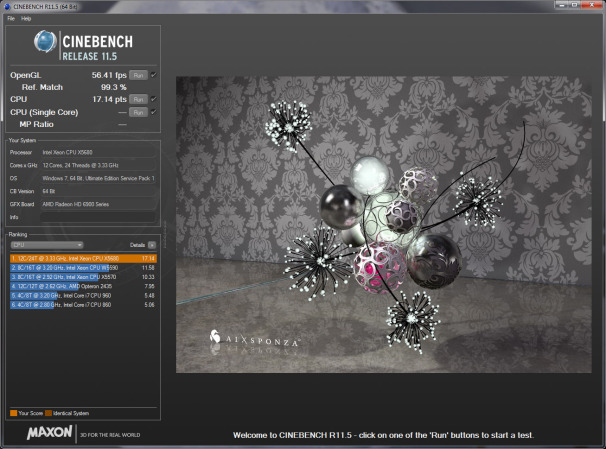
Another great benchmark for your CPU is Cinebench. Cinebench renders a 3D scene using the animation engine from Maxon’s Cinema 4D. Cinebench is free, works with multiple operating systems, and can run in single-threaded mode (to test the performance of a single CPU core) or in multithreaded mode (to tax all of the cores in a CPU). If all is working properly, an Intel Core i7-2700K will score about 1.55 in Cinebench’s (R11.5) single-threaded test and about 7.05 in its multithreaded test.

GPU

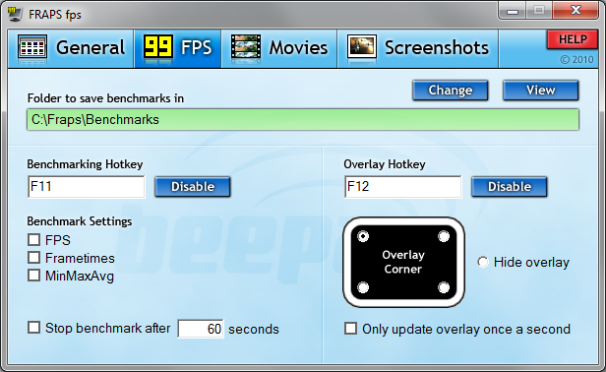
Myriad graphics-related benchmarks are available for testing a GPU’s performance. Many games have built-in tools to test performance; and you can test games that don’t with a utility called Fraps that shows real-time frame rates and tracks performance over time. Many synthetic and “canned” graphics benchmarks don’t use actual game engines to test performance, but produce comparable results anyway.

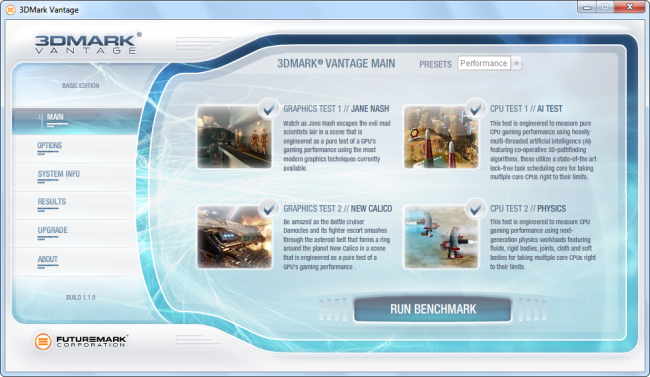
To test a GPU’s performance, we recommend using a mixture of synthetic and real-world tests to see how the GPU handles a range of different workloads. Futuremark’s 3DMark 7 is a popular program that provides an overall 3DMark score, as well as numerical results for each of the individual tests that contribute to the final score.

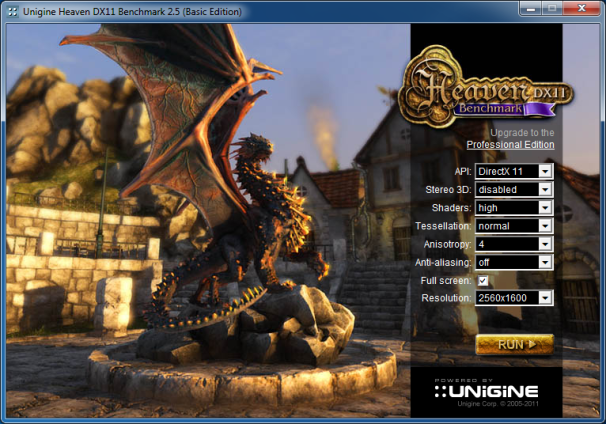
Another handy synthetic benchmark is Unigine Heaven. Heaven can test a GPU’s performance using DirectX 9, 10, or 11 or OpenGL paths, with varying levels of image quality and tessellation. Heaven’s results identify both an overall score and a frame rate.

In a system powered by an Intel Core i7-3960X, when tested at a resolution of 1920 by 1200 with 4X MSAA, 16X anisotropic filtering, and high tessellation, an Nvidia GeForce GTX 560 Ti will score about 665 points in Unigine Heaven, at about 26.4 frames per second. At the same settings, a Radeon HD 7850 will score about 706 points, at 28 fps. If you have a faster GPU than those cited here, your system should be able to beat these scores, but a slower GPU won’t be able to catch them.

Memory

The most common method of evaluating memory performance is through synthetic tests designed to ascertain peak bandwidth and latency. Performance variables include the operating frequency and capacity of the memory, and the number of channels that a given system uses.

AIDA64 Extreme Edition has a great built-in memory benchmark that tests read, write, and copy bandwidth, as well as latency; but it is available only as a limited trial unless you pay for the full edition of the tool.

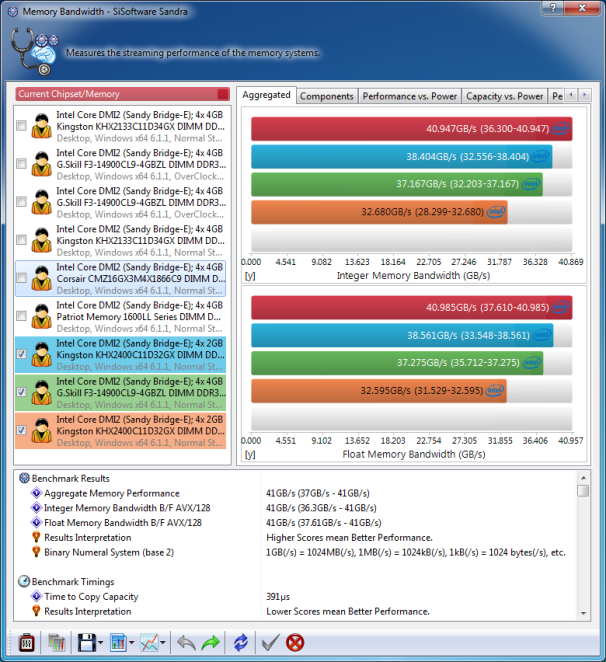
The free edition of SiSoft SANDRA 2012 offers memory bandwidth and latency tests, too. It reports bandwidth scores in gigabytes per second (GBps) and latency in nanoseconds. The tests are easy to run and take moments to complete. An Intel Core i7-2700K-based system with 8GB of DDR3-1333MHz system memory running in a dual-channel configuration (two memory sticks) should offer about 16 GBps of bandwidth at an access latency in the 29ns range. Higher clocked memory should deliver more bandwidth and lower latency.

Storage

To test the performance of a hard drive or solid-state drive correctly, use a benchmark that analyzes read and write transfer speeds (with both sequential and random workloads), as well as access latency. Trace-based tests, like those used in PCMark, that track performance over time with simulated application workloads are also very useful.

One of the better free tools available for testing a drive’s performance is CrystalDiskMark. This benchmark is really useful because it tests both sequential and random read and write speeds with both large and small block sizes, and with queue depths of up to 32.

CrystalDiskMark doesn’t report access latency, however, so it’s a good idea to use a tool such as HD Tune, IOMeter, or the Physical Disk Benchmark in SiSoft SANDRA 2012 to do that.
Benchmarking your entire system

Among total system benchmarks, the rather basic Windows Experience Index (WEI) built into Windows 7 and Vista isn’t a good choice, owing to the rudimentary nature of the tests and the lack of granularity in the results. Instead consider using a suite such as BAPCO’s Sysmark or Futuremark’s PCMark 7; both are widely accepted and generate extensive results. Sysmark is expensive and tends to be difficult to run, however, whereas PCMark 7 is available in a free basic edition and can be run with a single click.

PCMark 7 runs a wide range of tests that tax CPU, GPU, memory, and disk performance; and it generates scores for each test–with higher scores reflecting better performance. PCMark 7 tends to emphasize disk/storage performance, but we’re fine with that. Upgrading from a hard drive to a solid state drive tends to be one of the best upgrades a user can make to improve system responsiveness, and PCMark 7′s results reflect that.

To give you a baseline for comparison, an Intel Core i7-2700K-based system with 8GB of RAM, a discrete Nvidia GeForce GTX 280 graphics card, and a 7200-rpm hard drive will earn a PCMark score of roughly 3800. Upgrade that same system with an SSD, and its score will jump to about 5100.

Prime95

Prime95 is a popular CPU stress test and benchmark tool among overclockers. It’s part of a distributed computing project for finding Mersenne prime numbers, but it includes torture test and benchmark modes.

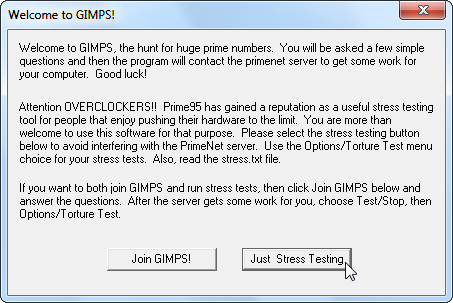
After you download the ZIP file and launch Prime95.exe, click the Just Stress Testing button to skip creating an account.

The torture test mode is ideal for testing the stability of your CPU, particularly if it’s been overclocked. If you want to perform a benchmark, click Cancel.

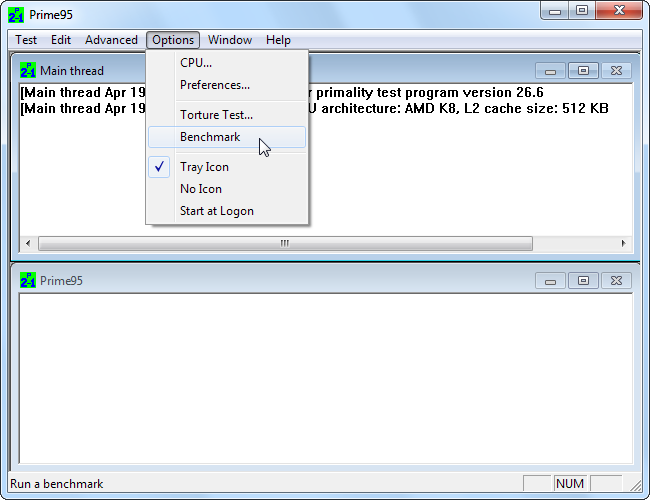
Use the Benchmark option in the Options menu to perform a benchmark.

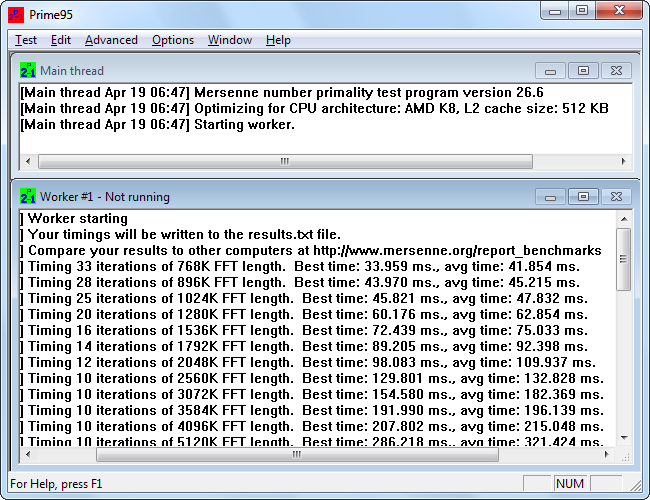
Benchmark results are measured in time – lower values are faster, and therefore better. If you’re testing an overclock, compare the results of the Prime95 benchmark before and after the overclock to see the difference in performance. You can also compare your benchmark results to other computers on the Prime 95 website.

Super Pi, which calculates the digits of pi, is another popular tool for stress-testing and benchmarking CPUs.

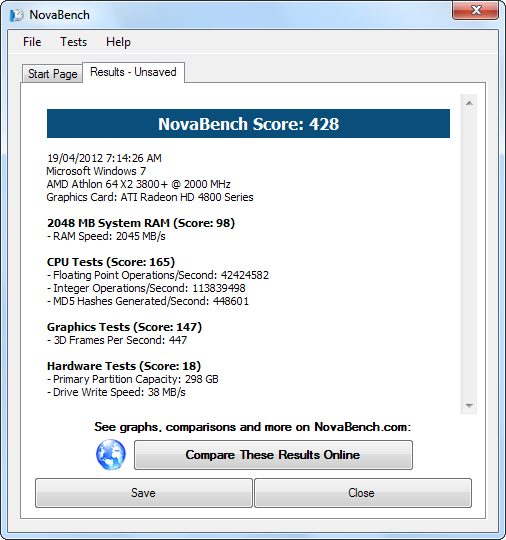
Novabench

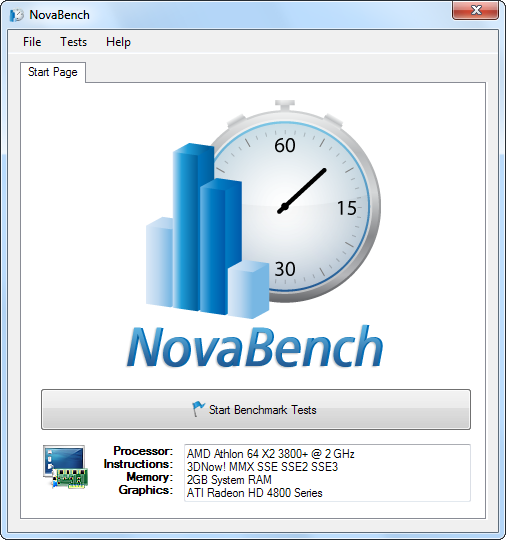
Novabench is a benchmarking suite with CPU, GPU (graphics card), RAM, and disk speed benchmarks. Unlike many all-in-one benchmark suites for Windows, Novabench is completely free. It’s not a trial and there’s no paid version with additional features that it’s trying to sell you.

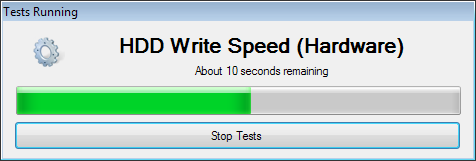
Novabench’s benchmark process is faster than many other full benchmark suites. It took about a minute on my system, while other benchmark suites took significantly longer.

NovaBench displays an all-round “NovaBench Score” – higher is better – and shows the results of each individual benchmark. You can view other benchmark results and compare your score to other computers on the NovaBench website.


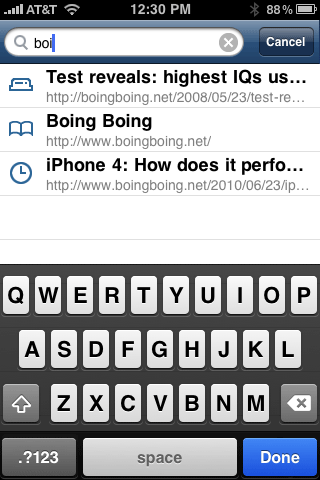
The popular open-source browser Firefox is awesome right when you download it. And by adding some of the awesome addons available for it, Mozilla Firefox just gets more and more appealing.

But when you look under the hood, and there are a number of hidden tips and tricks available that will crank the browser up for you – making it faster, easier, and more efficient to use.

Here are 10 really awesome Firefox tricks you can apply right now:


1. Add more screen space by making you icons smaller – Go to View >> Toolbars >> Customize and check the “Use small icons” box.

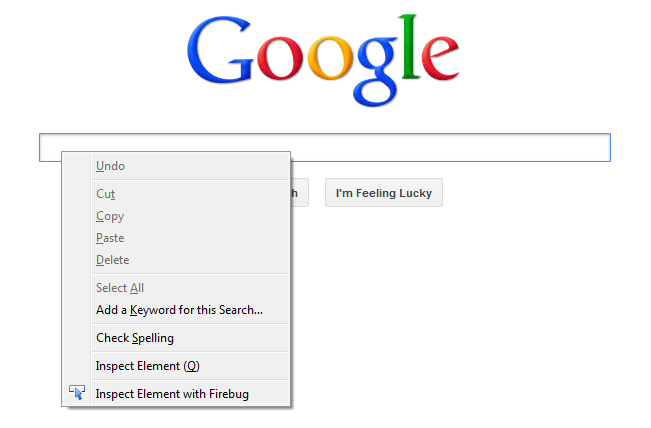
2. Use Smart Keywords – If there is a search term you enter a lot, this is a great tool that not many people take advantage of. Visit your favorite search engine, then right-click on the search box. Select “Add a Keyword for this search” give the keyword a name and an easy-to-type and easy-to-remember shortcut name and save it. Now, when you want to do a search for that term, go to Firefox’s address bar, type the keyword and press return. Instant search! You can do this with any search engine.

3. Keyboard shortcuts – It may take a little bit of time to master all of these, but as soon as you do, your browsing will be a lot faster – not to mention you won’t have to use a mouse anymore. Here are some of the most popular keyboard shortcuts for Firefox.

  • Spacebar (page down)
  • Shift-Spacebar (page up)
  • Ctrl+F (find)
  • Alt-N (find next)
  • Ctrl+D (bookmark page)
  • Ctrl+T (new tab)
  • Ctrl+K (go to search box)
  • Ctrl+L (go to address bar)
  • Ctrl+= (increase text size)
  • Ctrl+- (decrease text size)
  • Ctrl-W (close tab)
  • F5 (reload)
  • Alt-Home (go to home page)

4. Auto complete – Here’s another keyboard shortcut, but less known and even more useful. Go to the address bar (Control-L) and type the name of the website without the “www” or the “.com” Let’s say “google”. Then press Control-Enter, and it will automatically fill in the “www” and the “.com” and take you there – like magic! For .net addresses, press Shift-Enter, and for .org addresses, press Control-Shift-Enter.

5. Tab Navigation – Instead of using the mouse to select different tabs that you’ve opened, use your keyboard! Here are the shortcuts for that:

  • Ctrl+Tab (rotate forward among tabs)
  • Ctrl+Shft+Tab (rotate to the previous tab)
  • Ctrl+1-9 (choose a number to jump to a specific tab)

6. Mouse shortcuts – Sometimes you are already using your mouse and it’s just a lot easier to use a mouse shortcut than to switch over to your keyboard. Check out these really cool tricks for your mouse on Firefox:

  • Middle click on link (opens in new tab)
  • Shift-scroll down (previous page)
  • Shift-scroll up (next page)
  • Ctrl-scroll up (decrease text size)
  • Ctrl-scroll down (increase text size)
  • Middle click on a tab (closes tab)

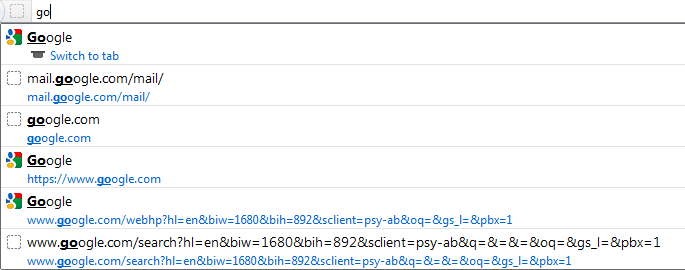
7. Delete items from address bar history – Mozilla Firefox’s ability to automatically show previous URLs you’ve visited, as you type, in the address bar’s drop-down history menu is very cool. But sometimes you just don’t want those URLs to show up. Go to the address bar (Ctrl-L), start typing an address, and the drop-down menu will appear with the URLs of pages you’ve visited with those letters in them. Use the down-arrow to go down to a web address you want to delete, and press the Delete key to make it gone for good.

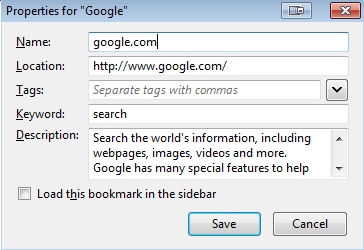
8. Add a keyword for a bookmark – Go to your bookmarks a whole lot faster by giving them keywords. Right-click the bookmark and then select Properties. Put a short keyword in the keyword field, save it, and now you can type that keyword in the address bar and it will immediately go to that bookmark.

9. Speed up Firefox – If you have a broadband connection, you can use pipelining to speed up you page loads. This allows Firefox to load multiple things on a page at once, instead of one at a time (by default, it is optimized for dialup connections). Here’s how you do it:

  • Type “about:config” into the address bar and hit return. Type “network.http” in the filter field, and change the following settings (double-click on them to change them):
  • Set “network.http.pipelining” to “true”
  • Set “network.http.proxy.pipelining” to “true”
  • Set “network.http.pipelining.maxrequests” to a number like 30. This will allow it to make 30 requests at once.
  • Also, right-click anywhere and select New-> Integer. Name it “nglayout.initialpaint.delay” and set its value to “0″. This value is the amount of time the browser waits before it acts on information it receives.

10. Limit RAM usage – If Firefox is taking up too much of the memory on your computer, you can limit the amount of RAM it is allowed to use. Go to about:config, filter “browser.cache” and select “browser.cache.disk.capacity”. It’s set to 50000, but you can lower it, depending on how much memory you have. Try 15000 if you have between 512MB and 1GB ram.

You can also reduce RAM usage even further for when Firefox is minimized. This setting will move Firefox to your hard drive when you minimize it, taking up much less memory. And there is no noticeable difference in speed when you restore Firefox, so it’s definitely worth a go. Again, go to about:config, right-click anywhere and select New-> Boolean. Name it “config.trim_on_minimize” and set it to TRUE. You have to restart Firefox for these settings to take effect.

a Rafflecopter giveaway


Mozilla Firefox includes many powerful features to prevent you from being tracked online, but they aren’t on by default. We’ll show you how to take control of your privacy online with Firefox’s options.

Firefox Internet Browser has some features that send personal data to Mozilla and Google, but these features aren’t required. Mozilla and Google use the date to improve Firefox, provide you with search suggestions and block malicious websites.

Firefox “Do-Not-TrackFeature

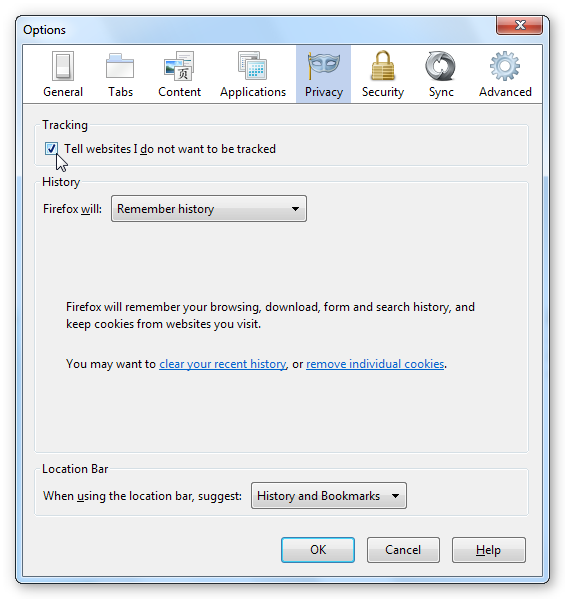
Firefox can send a “do-not-track” whenever you connect to a website, asking the website not to track you. It’s disabled by default, so you’ll have to turn it on yourself.

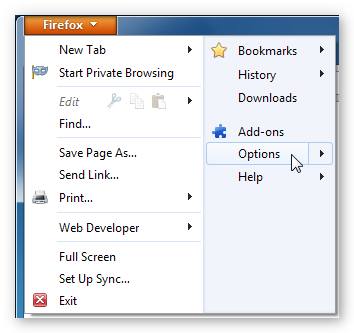
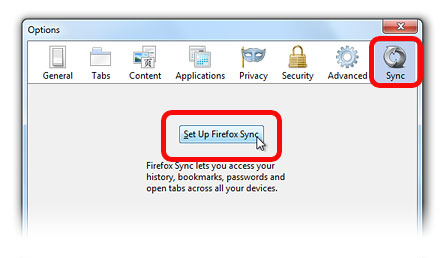
Select the Firefox menu, click Options and then the Privacy icon.

Click the “Tell websites I do not want to be tracked” check box at the top of the privacy pane to enable the do-not-track feature.

Unfortunately, few websites obey your do-not-track preference at the moment. Do not track is also available in Internet Explorer 9 and Apple Safari, but it’s noticeably absent in Google Chrome.

Search Suggestions

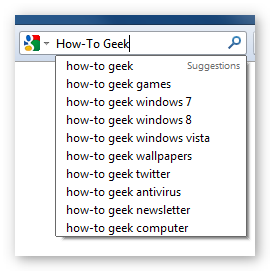
Firefox sends every letter you type into its search box to your default search engine, which sends search suggestions back.

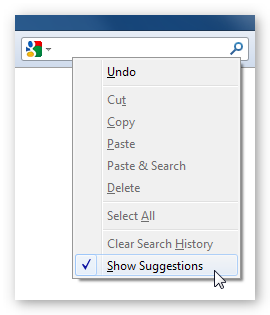
You can easily disable search suggestions by right-clicking the search box and unchecking Show Suggestions.

Safe Browsing

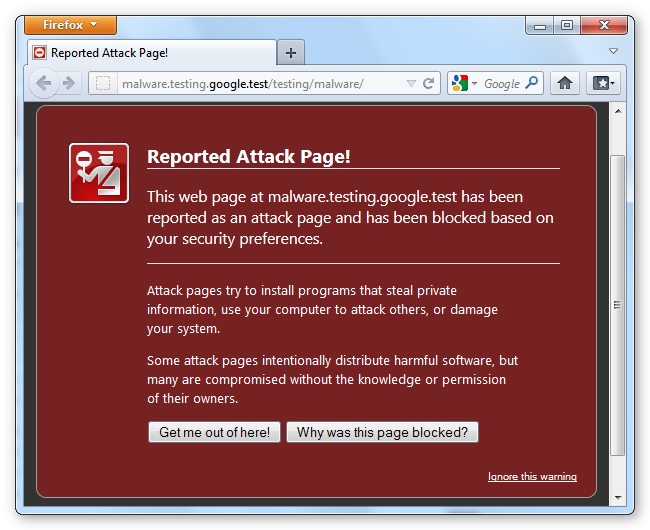
Firefox uses the same phishing and malware detection technology found in Google Chrome. Like Chrome, Firefox automatically downloads an updated list of malicious websites from Google every 30 minutes. If you try to access one of these websites, Firefox sends contacts Google to confirm the website is malicious.

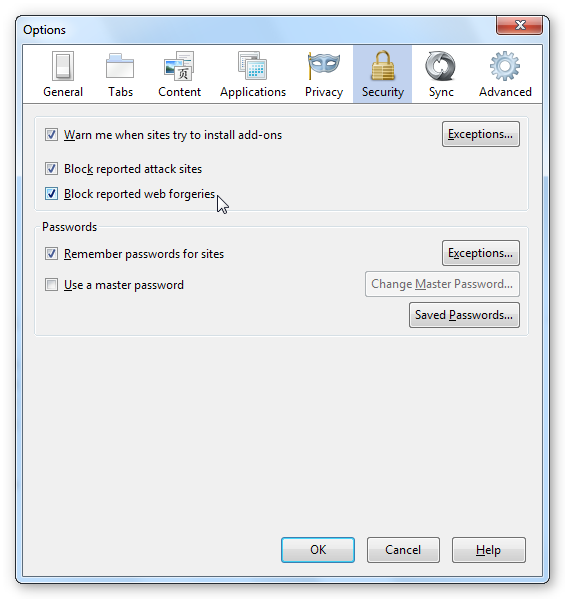
It shouldn’t be possible for Google to determine the exact website you tried to access, but Google cookies you have on your computer may also be sent. Phishing and malware detection helps protect your personal data and your computer’s security, but you can disable it using the options on the security pane.

Cookies

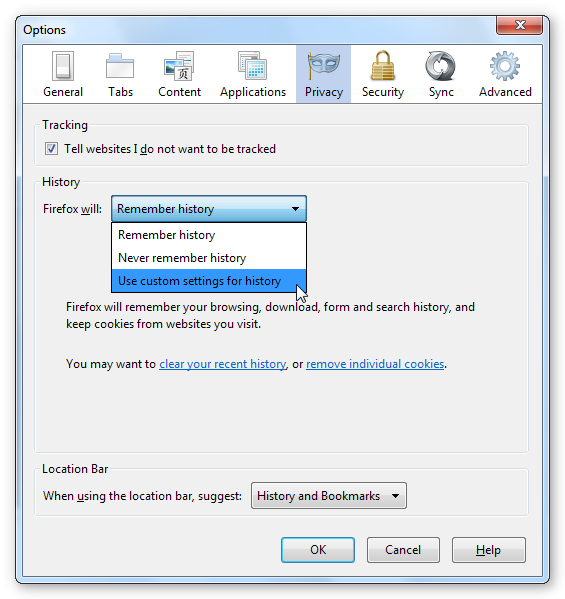
Click the “Firefox will” box on the privacy pane and select “Use Custom Settings for History” to view Firefox’s cookie options.

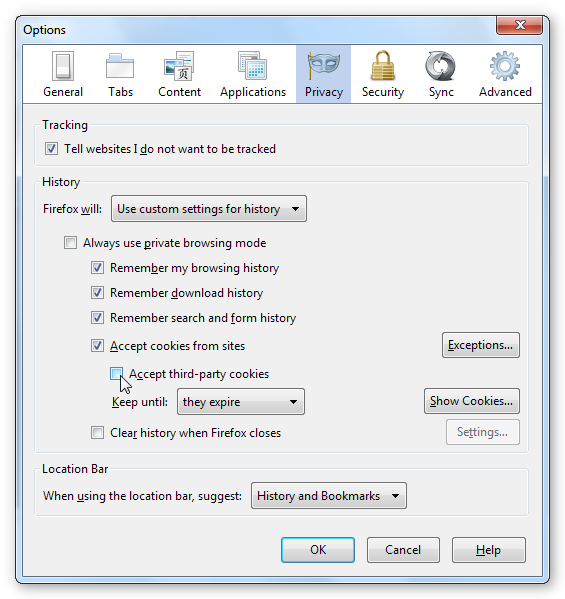
Many advertising networks track you across multiple websites with third-party cookies. You can disable these cookies by unchecking the Accept third-party cookies box. This may cause problems with some websites, so you may have to re-enable this check box.

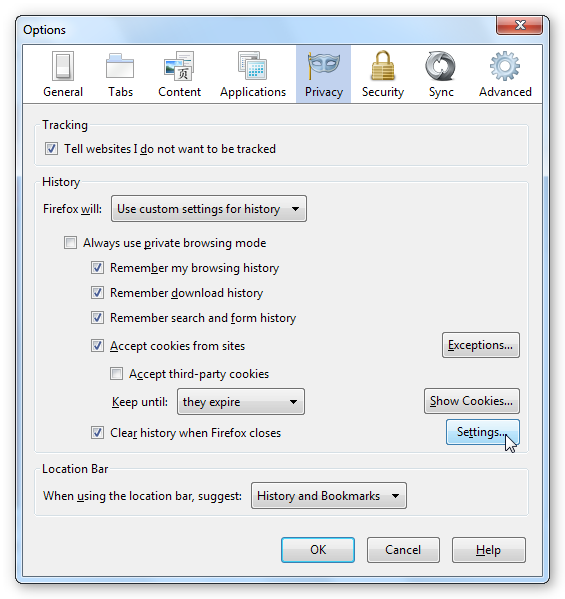
First-party cookies can be used for tracking, too. Many websites won’t work if you disable cookies entirely, but you can have Firefox automatically clear them each time you close your browser. This prevents websites from building up a profile of you over time, but you’ll have to log into any open websites each time you reopen Firefox. Just enable the “Clear history when Firefox closes” check box and click the Settings button.

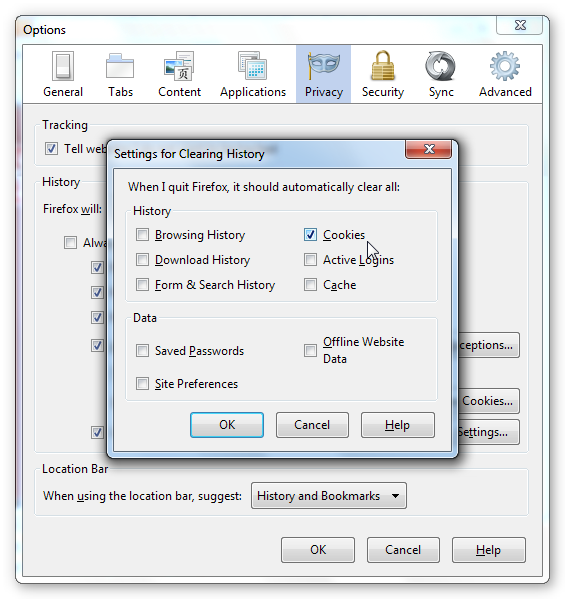
Select Cookies and any other type of data you want Firefox to automatically delete, and then click OK.

Crash Reports and Performance Data

Firefox can send crash and performance reports to Mozilla. Mozilla uses these reports to fix problems and help improve Firefox.

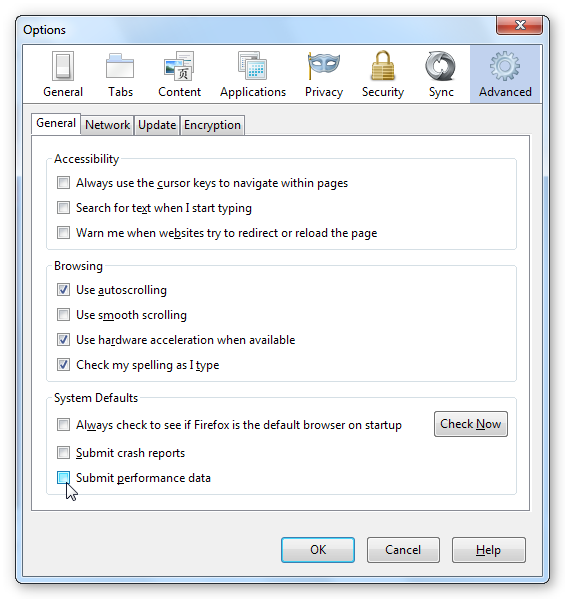
The Submit crash reports check box on the advanced pane controls the crash reports feature. Firefox never sends crash reports automatically; it always prompts you. You’ll still see the prompt if you uncheck this check box, but the crash report dialog will default to not sharing any data with Mozilla.

The Submit performance data option causes Firefox to send anonymous performance reports in the background. The reports contain information about how you use Firefox’s interface, how well Firefox is performing and what hardware your computer contains.

Remember to save your settings by clicking OK.


Here’s an in depth look at how to build a cell phone jammer:

Technical Details

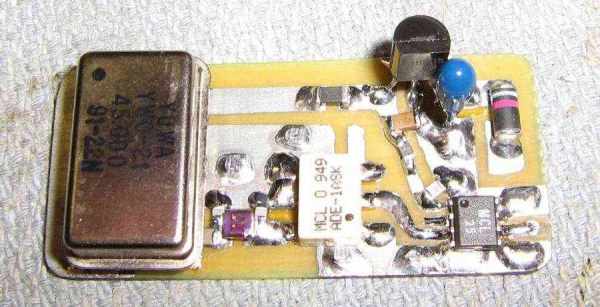
A lot of cell phones use a GSM800 mobile standard in order to operate, so my VCO (sweeping oscillator) is tuned to the 800MHz frequency range. Keep in mind that it could be difficult to make this  work properly without some good testing tools, but the end result will have the efficient VCO.

Use a clock oscillator for 45MHz as the noise generator for this jammer. It drives the local oscillator port which is located at the mixer. The signal is going out from the local oscillator and passes through the impedance matching network along its way. This helps equalize the impedance of 45MHz clock oscillator with the impedance of the mixer’s port.

This port acts like RF input of the signal jammer. The RF output signal passes through the amplifier on the mini-circuit. The output power is increased by additional 15-16dbm in this way. Then the output signal goes to the RF output antenna. RF input has the antenna too.

Jammer Operating

Use a 45MHz clock oscillator because the GSM800 band transmitted and received signals are always separated by the exact number of frequency and it is that 45MHz. Take this into account, cell phone user dials someone and signal goes off. RF input antenna catches it and jammer modifies this signal and lets it go. This signal has a frequency of cell phone’s received signal, so cell phone user would hear their own voice in a phone!

This particular cell phone jammer might be used to block the signal of the cell-based car tracking device which records your GPS data and sends it to some other person. And it probably can even jam some IED signals if they are controlled by cell phone GSM800 band.

The used mixer was originally made for 600MHz but with a little modification it works perfectly for 800MHz.

The amplifier is great for output power. Although it draws additional power supply, it is worth it.

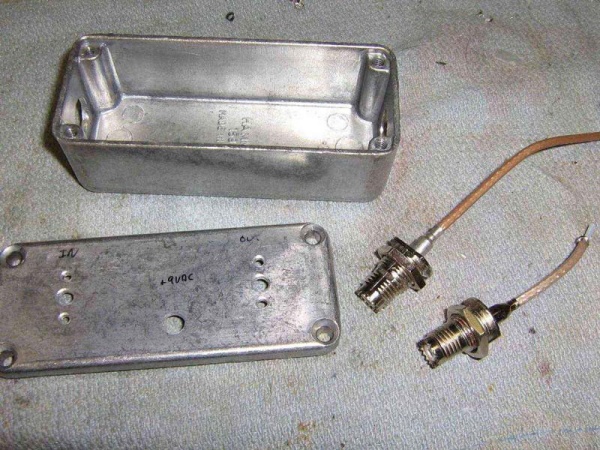
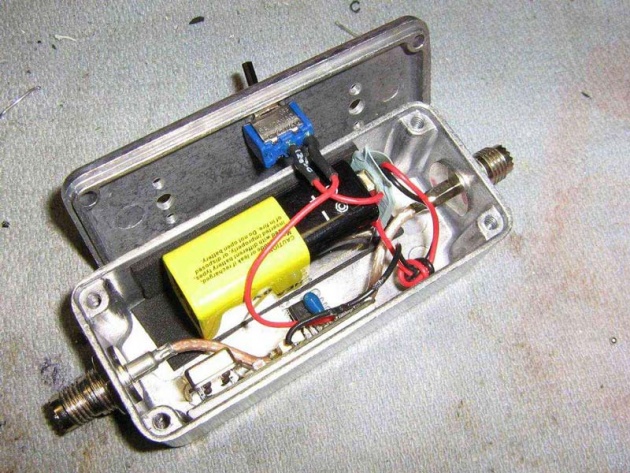
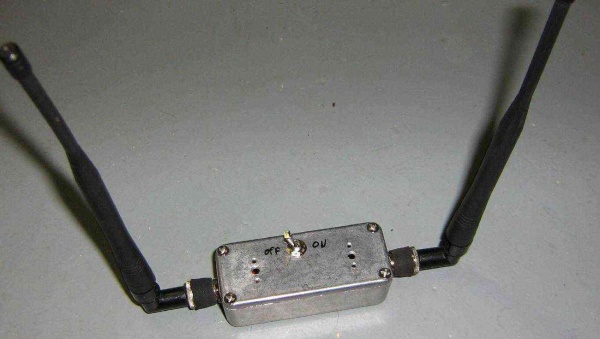
Jammer case was made from old aluminum box and UHF connectors you can take from an old Motorola phone.

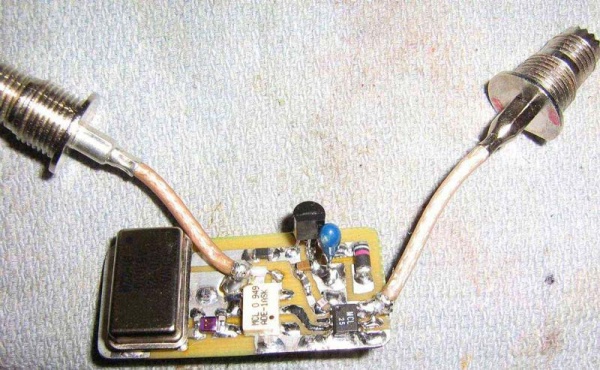
Those connectors must be soldered to the mini-circuit to work properly.

To supply this little signal jammer the nine volts battery with voltage regulator is enough. Separate it from other electronic components with foam plastic.

Don’t forget to make a power switch for your new creation. Also remember to attach antennas to the UHF connectors.

© 2011 Suffusion theme by Sayontan Sinha
WordPress SEO fine-tune by Meta SEO Pack from Poradnik Webmastera